Curriculum: extend with new fields and objects
Curriculum can easily be extended by the administrator in defining new fields or custom objects. The configuration enables extension of any educational object (e.g. study, specification, organisation, module-group, module, ...) on top on the already pre-configured setup. Any added field will be immediately available for reports and in the API.

Manage custom-fields and custom-objects behaviour
The Administration -> Custom fields menu offers two functions:
- Configure the behaviour of pre-defined Curriculum fields and objects
- Extend the basic definition by adding new fields and/or objects
Selecting the menu will provide an overview of all available main objects (e.g. Academic year, Assessment, Assignment, ..., Study, Qualification) and for each object the available sub-objects.

Open the object type to be managed.
The example shows the configuration options for the Module object.
There are three options marked red:
- Module (module) - right top-hand corner. Allows to quickly switch between the different sub-objects in Module.
- General - the option to define the basic object behaviour
- Custom fields - the option to change pre-defined field configurations or extend Curriculum with new fields (next section).
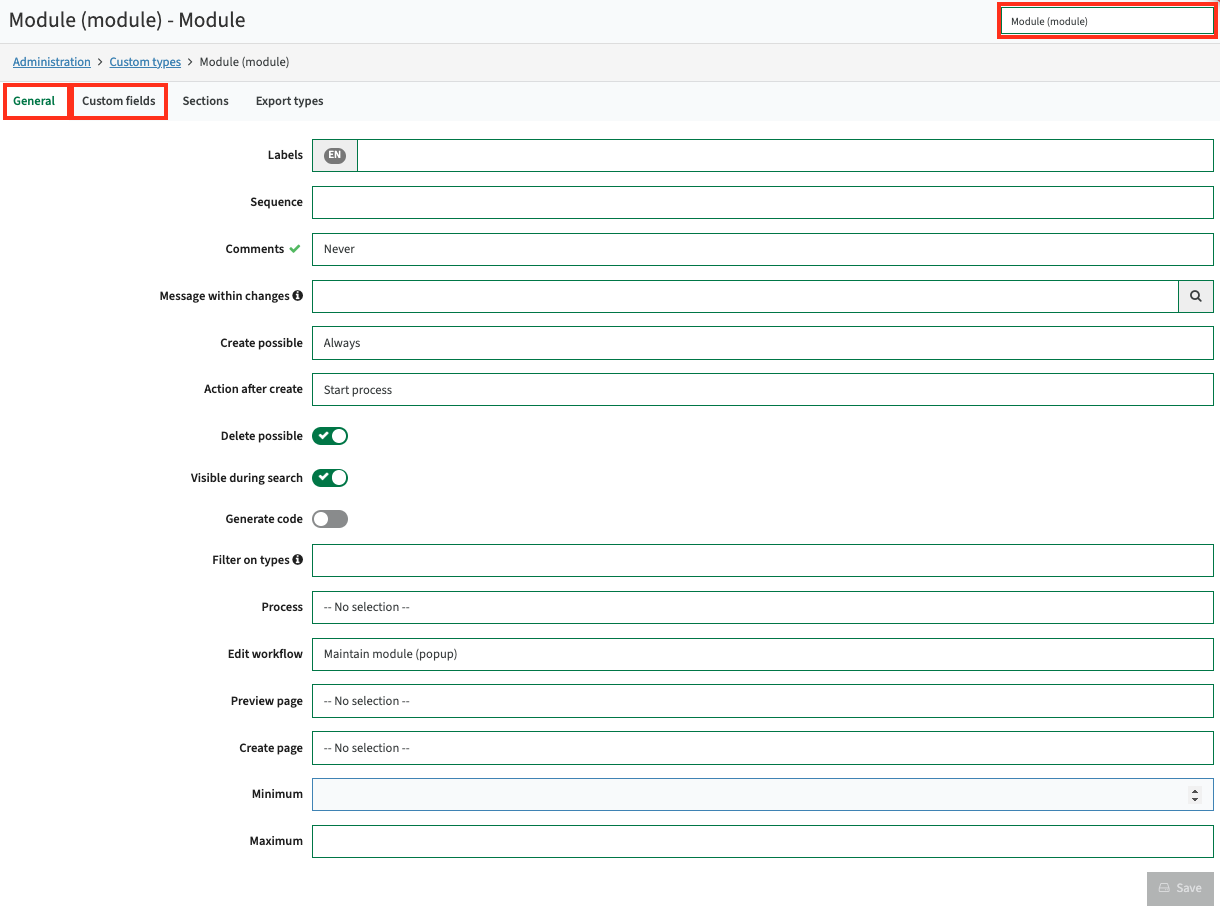
The basic object configuration supports a number of configuration options:
- Label - The name that will be used showing the module, instead of the system defined label.
- Sequence - The order in which the object is shown in the list
- Comments - Define the generic behaviour for changes to fields defined on the Module (module) object/sub-object. This will be the default behaviour that can be overwritten in the individual Page configurations
- Message within change - Configurable message to show within changes made on objects of this type. This message will overwrite the standard Curriculum message. The following variables are supported:
- {{createdBy}}
- {{changeType}}
- {{changeTypeLowerCase}}
- {{changedEntity}}
- {{rootEntity}}
- Create possible - Defines if and when changes to the Module are allowed:
- Always - create is always allowed, based on authorisation
- Never - create is never allowed (not even for admins)
- Simulation - create is always allowed in a simulation
- Action after create - Defines what action is executed after the creation of a new object:
- Open in new tab - The create will open an new tab with the Create page allowing to enter the requested information
- Open popup - The create will open a popup with the Create page allowing to enter the requested information
- Start process - The create will start a process, the task will be available at the Dashboard of the assigned stakeholder
- Start process in popup - The create will start a process that opens in a popup. Simultaneous a task will be made available at the users dashboard, so closing the popup will still allow to finish the creation process at a later stage from the dashboard task.
- Delete possible - Defines if it is allowed to delete modules by admins
- Visible during search - Is the object (module in this example) search using the quick-search
- Generate code - Will the code (main object identifier) be generated by Curriculum using a formula defined at the Code field.
- Filter on types - Filter on module type (code), to only enable module for specific module types
- Process - Configure the process that should be used at create (Action after create = process)
- Edit workflow - Configure the workflow to be used on Edit of the object. E.g. the edit of a module in the study structure tree.
- Preview page - Configure the page to be used when previewing the object. E.g. a read-only rows page providing the report.
- Create page - Configure the page used at create (Action after create = popup / tab)
- Minimum - Minimum number of objects required in a parent object. This is more relevant for the assessment and method schemes where you can set that at least 1 methods is required.
- Maximum - Minimum number of objects allowed in a parent object.
Extend curriculum by adding custom-fields
The Administration -> Custom fields menu offers two functions:
- Configure the behaviour of pre-defined Curriculum root objects and their child objects and fields
- Extend the basic definition by adding new fields and/or objects
Selecting the menu will provide an overview of all available main objects (e.g. Academic year, Assessment, Assignment, ..., Study, Qualification) and for each object the available sub-objects.
Open the object type to be managed.
The example shows the configuration options for the Module object.
There are three options marked red:
- Module (module) - right top-hand corner. Allows to quickly switch between the different sub-objects in Module.
- General - the option to define the basic object behaviour
- Custom fields - the option to change pre-defined field configurations or extend Curriculum with new fields (next section).
The basic object configuration supports a number of configuration options:
- Label - The name that will be used showing the module, instead of the system defined label.
- Sequence - The order in which the object is shown in the list
- Comments - Define the generic behaviour for changes to fields defined on the Module (module) object/sub-object. This will be the default behaviour that can be overwritten in the individual Page configurations
- Message within change - Configurable message to show within changes made on objects of this type. This message will overwrite the standard Curriculum message. The following variables are supported:
- {{createdBy}}
- {{changeType}}
- {{changeTypeLowerCase}}
- {{changedEntity}}
- {{rootEntity}}
- Create possible - Defines if and when changes to the Module are allowed:
- Always - create is always allowed, based on authorisation
- Never - create is never allowed (not even for admins)
- Simulation - create is always allowed in a simulation
- Action after create - Defines what action is executed after the creation of a new object:
- Open in new tab - The create will open an new tab with the Create page allowing to enter the requested information
- Open popup - The create will open a popup with the Create page allowing to enter the requested information
- Start process - The create will start a process, the task will be available at the Dashboard of the assigned stakeholder
- Start process in popup - The create will start a process that opens in a popup. Simultaneous a task will be made available at the users dashboard, so closing the popup will still allow to finish the creation process at a later stage from the dashboard task.
- Delete possible - Defines if it is allowed to delete modules by admins
- Visible during search - Is the object (module in this example) search using the quick-search
- Generate code - Will the code (main object identifier) be generated by Curriculum using a formula defined at the Code field.
- Filter on types - Filter on module type (code), to only enable module for specific module types
- Process - Configure the process that should be used at create (Action after create = process)
- Edit workflow - Configure the workflow to be used on Edit of the object. E.g. the edit of a module in the study structure tree.
- Preview page - Configure the page to be used when previewing the object. E.g. a read-only rows page providing the report.
- Create page - Configure the page used at create (Action after create = popup / tab)
- Minimum - Minimum number of objects required in a parent object. This is more relevant for the assessment and method schemes where you can set that at least 1 methods is required.
- Maximum - Minimum number of objects allowed in a parent object.
Extend curriculum by adding custom-objects
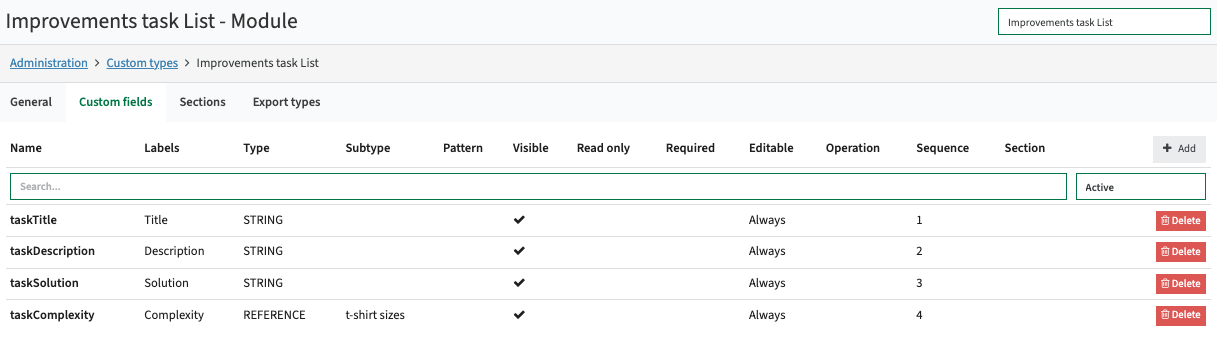
Extending Curriculum with new objects will use the custom fields tab, marked red in the picture above. In Curriculum a self-defined object is a simple (un-nested) object that acts like a recordset with its own fields.
Definition of a new or managing an existing self-defined object is done either using the Add-button, or by clicking on the object.
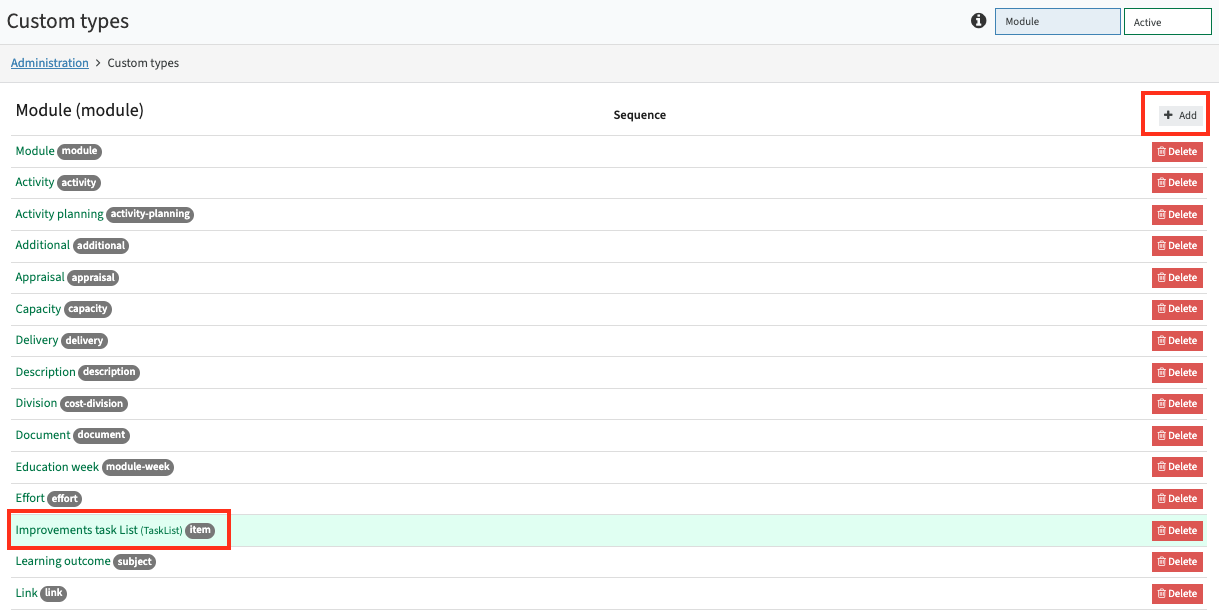
The self-defined objects can be identified by looking at the type. In case of a self-defined object the type = item.
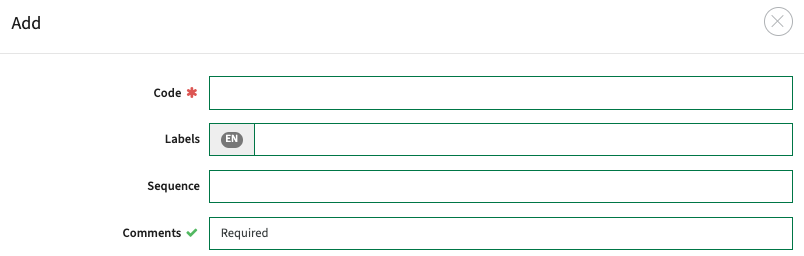
Click on Add to create a new object.
All configuration options available for general object behaviour can be used, but in 99.9% of cased only the fields shown in the example are necessary.
The object will be created, and the next step is to edit the object by adding the fields to be available for the object.
This is exactly the same as adding / managing fields on any of the other objects covered in the previous section.