Curriculum: configure workflows
Workflows are used to support stakeholders performing tasks that are started from a process. A workflow can be considered a tailored wizard offering / requesting exactly the information for that specific task. This to provide focus and prevent having an overload of information that might affect the effectiveness of the user. The definition and configuration of workflows is covered in this guide.

Defined workflows
Workflows are used to define the flow of screens (wizard) that support the different stakeholders to fulfil their tasks. In general a workflow will be defined specifically for each status in a process. In the process definition this workflow is assigned to a status to define the screen flow and stakeholder to perform the task related to that status.
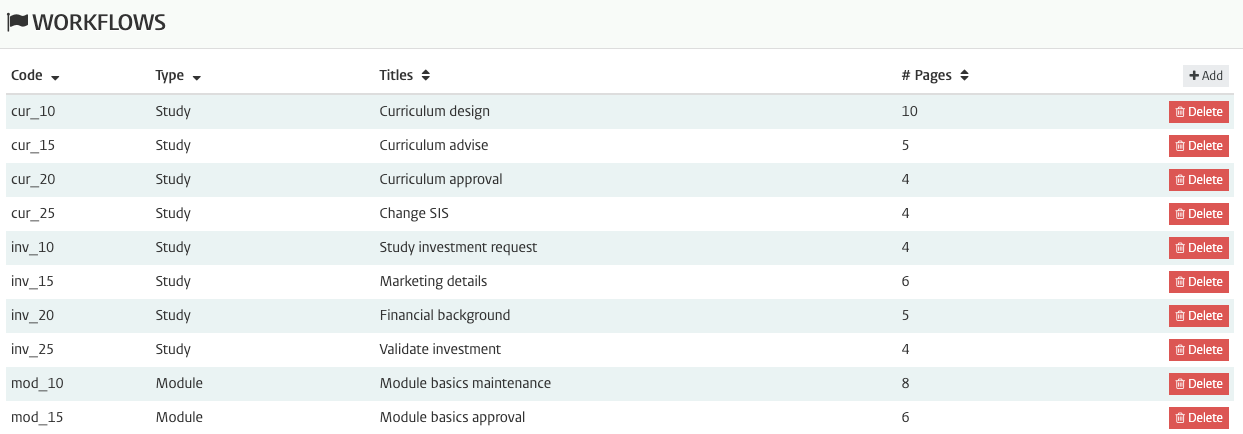
Select the menu option Workflows to get an overview of all defined workflows.
Define and configure the workflow basics
Workflows can be defined on each of the native Curriculum object types: Faculty, Organisation, Specification, Study, Module group, Module, Team, Person and Year.
From the overview workflows can be added using the Add button, deleted using the Delete button, or modified by clicking on one of the defined workflows.
Creating a new workflow offers two tabs to specify the workflow.
During specification the number of tabs supporting specific configuration will be added based on the selected pages/forms.

The first step is to configure the general settings that define the overall behaviour of the workflow.
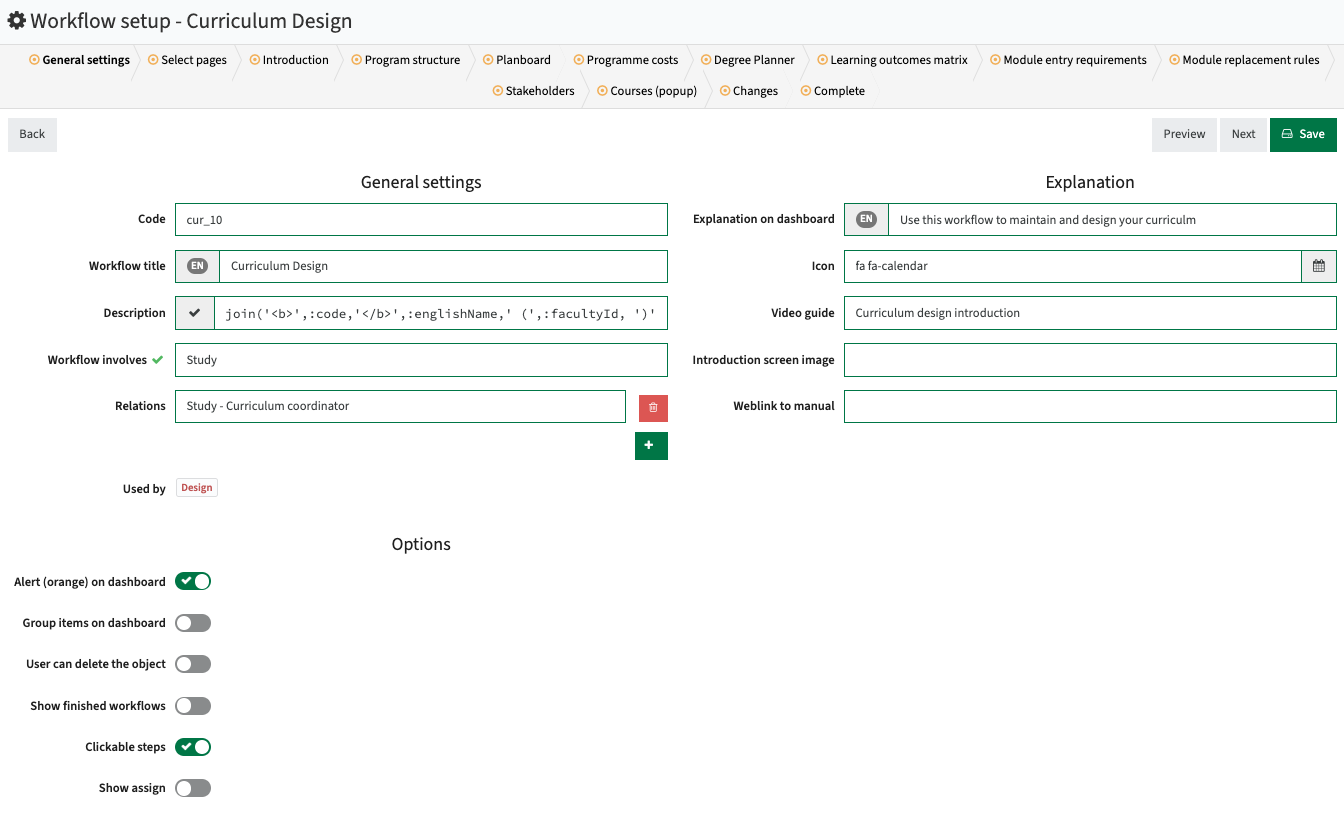
The configuration of the workflow supports different options:
- Code - The (optional) code is an arbitrary code used for sorting the list of workflows. By defining a code with a sequence number the workflows beloning to a specific process are kept together in the workflow list.
- Workflow title - The title shown in the header / navigation of the workflow page and on the dashboard task widget.
- Workflow involves - The object the workflow supports. Options available are:
- Faculty
- Organisation
- Specification
- Qualification
- Study
- Module group
- Module
- Method
- Assessment
- Team
- Person
- Assignment
- Description - Overrule the standard layout of the information shown in the Task widget. The information can be styled using HTML-tags and fields available on the object the workflow is meant for. In the screenshot an example is (partly) shown, in full it is: join('<b>',:code,'</b>',:englishName,' (',:facultyId,')').
Using the standard rule and formula builder functions this will lead to a layout showing like: ABC123 My first program (SW) - Relations - Definition of the relations (roles) that are assigned to the workflow.
Multiple relation types can be assigned. Based on hierarchy the 'higher defined' relations (roles) can be assigned and will be evaluated when assigning task. F.i. a workflow at module level will allow assigning the module coördinator but also the program directory of the program that 'owns' the module. - Used by - Overview of the process(es) that use the workflow. Click on the process to navigate directly to the process definition.
- Explanation on dashboard - Additional information (help accessible via mouse-over) on the process in the dashboard task widget.
- Icon - The icon shown in the header and welcome page of the workflow.
Icons can be selected from the font Awesome (https://fontawesome.com/icons?d=gallery) - Video guide - The video to be shown at the introduction page.
The video has to be defined first via the video menu-item. - Introduction screen image - URL to an image to be shown on the introduction page
- Weblink to manual - URL to the manual (page) to be shown on each page of the workflow.
- Alert (orange) on dashboard - Add an attention (color) to the dashboard task widget for this workflow
- User can delete the object - Indicator if the user can delete the object being modified with the workflow.
- Personal - Indicator for Person related processes and workflows only. By setting the flag 'personal' the workflow is considered to be for the logged in user, e.g. the lecturer that provides the availability. In case the workflow is not flagged as 'personal' the workflow actor is determined based on the hierarchical role (faculty or organisation)
In most cases this is used for object just created (new), to allow removal of accidental created objects. - Group items on dashboard - Group similar items for this workflows in the dashboard task widget, e.g. show all module task grouped by the study.
- Show finished workflows - Indicator if finished workflows are still shown to the user in the widget.
- Clickable steps - Allow the workflow steps to be used as 'tabs' and freely navigate between the different information pages.
- Show assign - Define if the Assign button in the workflow should be shown.
In case an administrative department is responsible for a task in the process, leading to a huge amount of tasks, the assign option can be of help.
Assign allows users to assign a task to themselves or a colleague. The colleagues working from the same task list will have direct insight if a task is already picked-up (assigned) and with mouse-over by who. There is no lock on take-over, so a already assigned task can just be picked up by another colleague.
Configure the used pages/forms (select pages)
The next step is to select the pages to be used in this workflow.
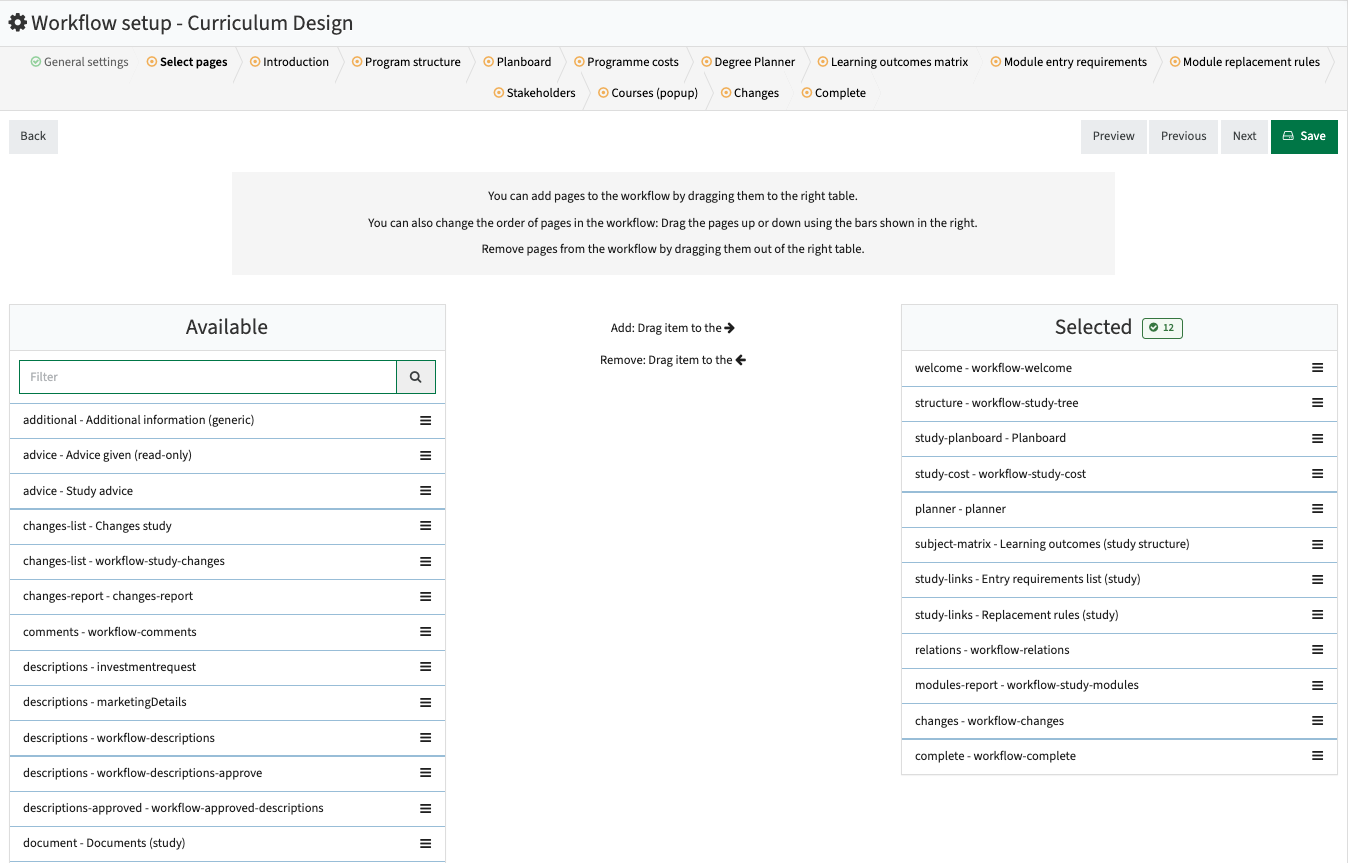
The pages to be shown in the workflow can be selected by drag and drop the desired pages from the Available pages to the Selected pages.
The drag and drop can also be used to define the order in which the pages are shown.
The guide Curriculum: Configure (workflow) pages provides the information on what pages are available, how to configure them and how to define your own pages that can be used in workflow configurations.
Configure the page details
Each selected page is added as a tab in the workflow configuration. By selecting the page(s) the individual behaviour and information in the workflow can be configured.

The configuration of the workflow supports different options:
- Title of the workflow page - The title shown in the workflow header / navigation page and the dashboard task widget.
- Explanation shown on the page - Information shown on top of the page to the user executing the task/workflow.
- Condition - Expression that configures the page visibility. For instance a specific page should only be shown in case of a study of type MI (minor), and otherwise the default page should be shown. This can be configured using a Condition in the same workflow by adding :typeId= MI and :typeId != MI to the respective pages.
Configuration of available video for workflows
The workflows can be enriched, for example with instruction video's.
The menu option Video is used to define and configure the video's available for use in the workflow definition.

The video can be managed by click on a defined video or via the Add and Delete buttons.
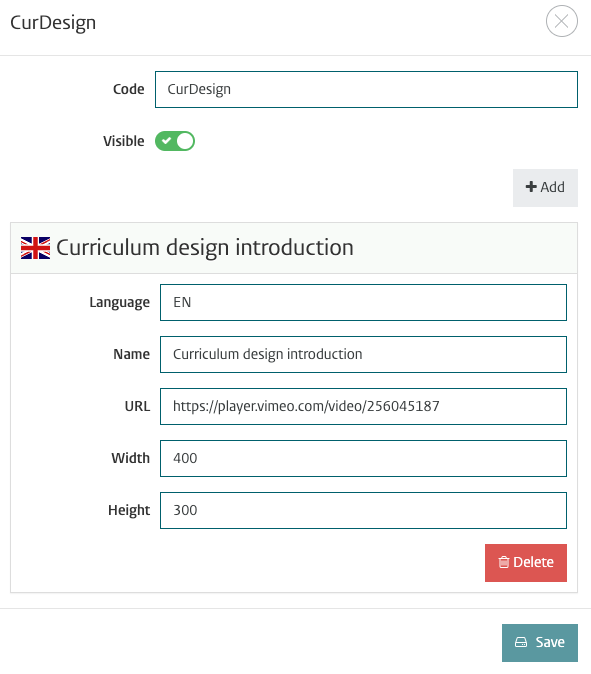
The configuration of the video consists of a generic part (code, visible) and an option to Add one or more language specific videos.
The configuration of the video supports the following options:
- Code -Unique identifier
- Visible -Indicator if the video can be selected in the workflow configuration
Define one or more videos with configuration options:
- Language - Language of the video. If a video is available in the language of the user, this will be used. Otherwise it will default to the defined video.
- Name - The short name/description shown in the l ink information to the user.
- URL - The URL to the video
- Width - The width of the preview window when opening the video.
- Height - The height of the preview window when opening the video