Evaluation: manage the basic system configuration (Admin menu)

- In this lesson:
- 1Start import
- 2Organisations
- 3Persons (users)
- 4Relations
- 5Elements (additional tags)
- 6Labels
- 7Periods
- 8CSV upload and REST API
- 9News
- 10Parameters
- 11
Start import
The Admin -> Start import option allows the administrator to manually kick-off a synchronisation with an external system.
Based on the designed and implemented integration pattern this option will be available or disabled.
In case the integration is fully steered by for instance Curriculum and/or the SRS, there will be no option to start synchronisation from Evaluation.
In case the integration is based on 'pull' where Evaluation retrieves information, or where a specific endpoint is implemented where the Evaluation manager can request for the SRS or Curriculum (re)sending the data the function will be available.
The request supports two configuration options:
- Period: limit the evaluations to be retrieved based on the offering period.
- Limit: limit the number of requests handled, for instance only the first 10. Handy for testing.

Organisations
The Admin -> Organisation option allows to configure different organisation units (e.g. faculties) in Evaluation.
The organisations can be used in reporting for grouping based on an organisation, or workflows to distinct between different organisation.

Persons (users)
The Admin -> Persons option allows to define and manage persons (users) in the system.
In a standard setup the users will be provisioned, so the management will be limited to some specific functions.
In certain cases it can be useful to create and/or manage persons in the system.
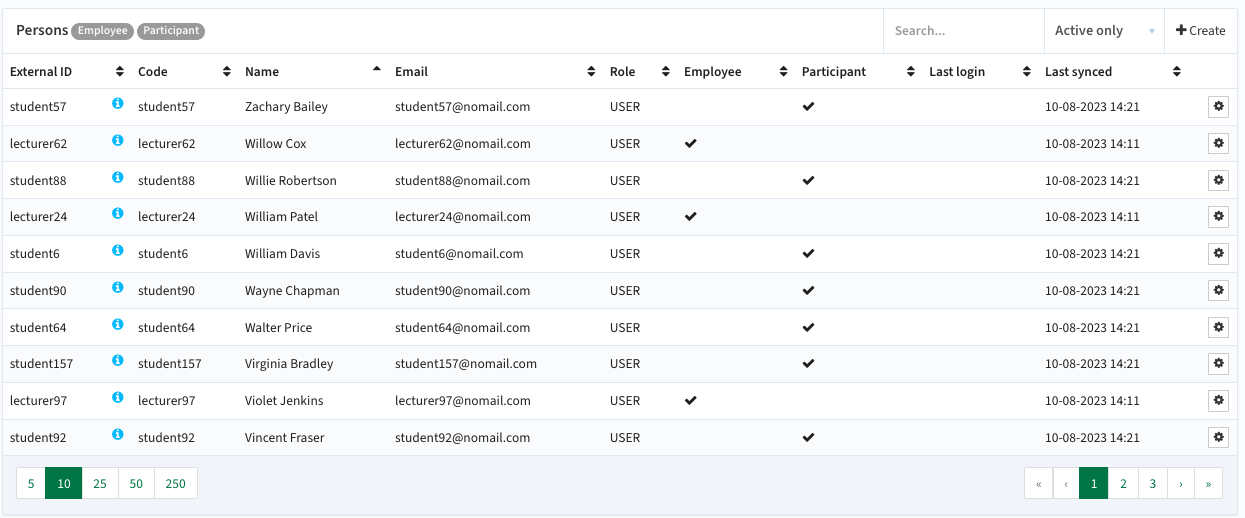
Navigation to the menu option will open the overview of all users defined in the system.
Filtering is allowed on:
- User type: select the desired type Employee or Participant
- Active only: only show the users that are still active (end date not passed)
At the right hand of each user record the 'cog-icon' is displayed. Click on the icon will open the sub menu with supported actions.
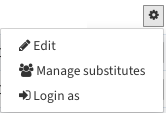
- Edit: Allows for editing a user and assigning roles to users.
- Manage substitutions: Allows for defining personal substitutes, e.g. during holidays or other leaves. Substitutes will be able to perform all tasks of this person.
- Login as: View and navigate the system from the perspective of a user.
In case Manage substitutions is selected, one or more persons can be assigned as the substitute.
- Use the Assign button to add new persons that will be a substitute.
- User the Delete button to end the substitution

Create / manage users (person)
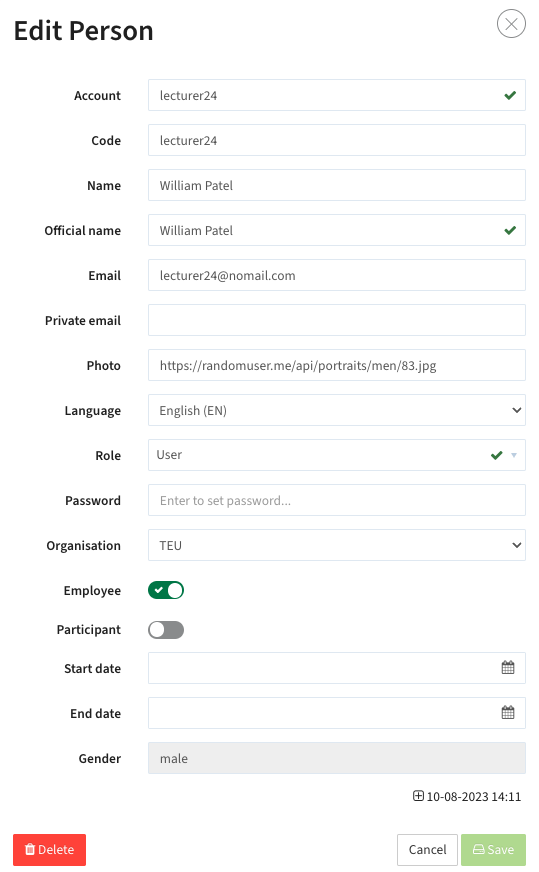
Use the Create button at the top of the user list, or the Edit option under the cog-icon to create / modify a user.
Different fields can / need to be filled to define the user:
- Account: the login identifier of the user. This will be the unique login name used for SSO and will be provided as the unique identifier by the provisioning.
- Code: optional additional identifier that can be used in integration scenario's where receiving systems don't have the Account, but have a different identifier.
- Name: Display name of the person.
- Official name: Official name of the person.
- Email: Email address of the person.
- Private email: optional personal email address. Used for student evaluations where students have no longer access to their institution email, e.g. graduation evaluation.
- Photo: optional URL to a profile photo. Used in lecturer related questions to show a picture of the lecturer.
- Language: Preferred language of the user.
- Role: The role of the user.
- Admin - can do 'everything' except for adjusting specific system settings.
- Archive system - role specifically setup for the archiving function
- Import system - role specifically setup for systems delivering information to Evaluation based on automated integration.
- Evaluation coordinator - allowed to create evaluations, templates and workflows . Has no access to the Statistics, Admin and System tabs
- Participant - highly restricted role, only allowed to fill out an evaluation (if added) and view a report through a link.
- Portal - participant only having acces to the participant portal (requires student login)
- System Admin - Can view everything as an Admin including several logs and specific functions.
- User - Can view evaluations and depending on the configuration create ad-hoc evaluations and adjust certain aspects of standard evaluations.
- User coordinator - role that allows to manage users.
- Password: Set a password for the user. Only used in cases SSO is not (yet) implemented.
- Organisation: Indicate to which organisation (faculty) the user belongs to.
- Employee: Indicate whether this person is an employee (if this switch is off, the user is registered as a 'student').
- Participant: Indicate whether this person is a participant.
- Start date: the optional start date of the user
- End date: the optional end date of the user. The end date is used for the cleanup functions.
- <tags>: when editing a user that has been assigned so called tags, the tags (e.g. Gender) are shown read-only at the bottom of the edit screen.
Relations
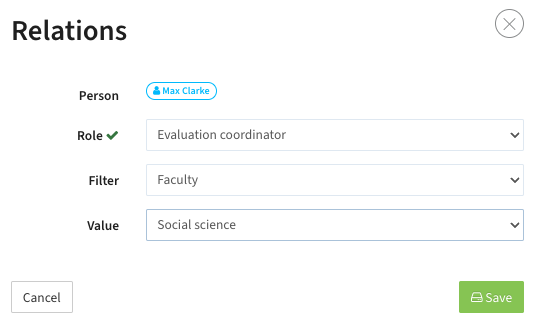
The Admin -> Relations option allows to assign specific users to a role in context of a faculty or study.
After selecting the menu option the overview of defined relations is shown.
User the filter to switch between the defined evaluation types.
The example shows the defined relations for the evaluation type Ad-hoc.

New users can be assigned to a role, or an existing role can be modified using respectively the Create button or the Edit button.
The form shows the following fields:
- Person: display / select the person the relation is defined for
- Role: select the role for the defined relation
- Filter: specify what filter to use (faculty or program of study)
- Value: select the faculty or program of study
Elements (additional tags)
The Admin -> Elements option allows to define additional tags for persons and evaluations that can be used for filtering in reports.
Selecting the menu option will show a report of all labels defined in Evaluation.

A new element (tag) can be created using the Create button, an existing element can be changed by clicking on the item.
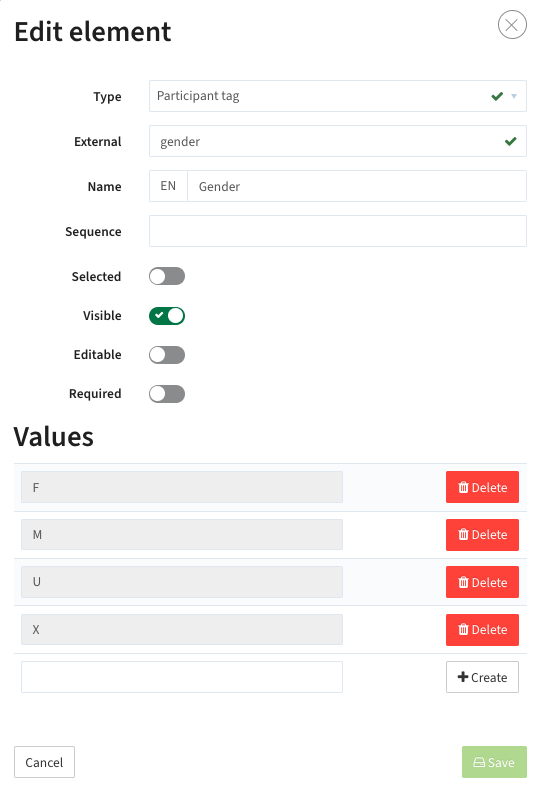
Different fields can / need to be filled to define the element:
- Type: set the data object type the tags will be available. Supported types are:
- Evaluation tag - attribute is added to the evaluation. E.g. add the average grade to the evaluation.
- Participant tag - attribute is added to the participant
- Person tag - attribute is added to the users (staff)
- External: unique identifier for the added tag. The external ID is used for automated interfaces that provide the additional information.
- Name: name of the element shown in the user interface
- Sequence: define the order the different added element are shown in list boxes or reports
- Selected: indicator if this element is default selected in reports
- Visible: indicator if this element is visible for users
- Editable: indicator if this element is editable by the user. Used in scenarios where additional information is provided by an automated interface from an external system and the user should not be allowed to change.
- Required: indicator if this element is considered required.
- Values: the supported tag options (values). Use the Create / Delete buttons to manage the list of supported options.
Labels
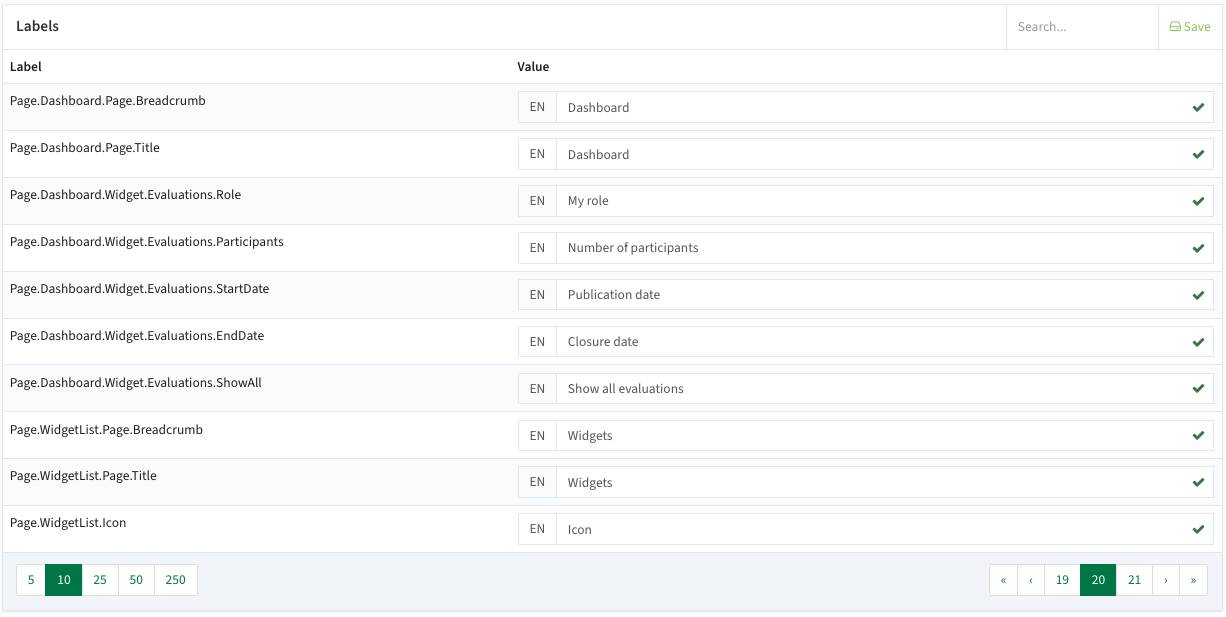
The Admin -> Relations option allows to manage all labels defined in Evaluation. This allows for using your internal used vocabulary by changing the relevant labels.
Selecting the menu option will show a report of all labels defined in Evaluation.
The change of a specific label is a combination of an estimated guess and validate if the desired label is changed. The following tactic can be used best.
- Search for the label text to display the label(s) with the text
- In case multiple labels are shown, interpret the technical key and adjust the most obvious match
- Refresh the page on which the label was found
- If the new text is visible, the right label has been changed
- If the new text is not visible after refreshing the page*, you should change the label back to the original text and try one of the other labels.
Periods
The Admin -> Periods option allows for configuring the periods.
Selecting the menu will open the overview of all defined periods.
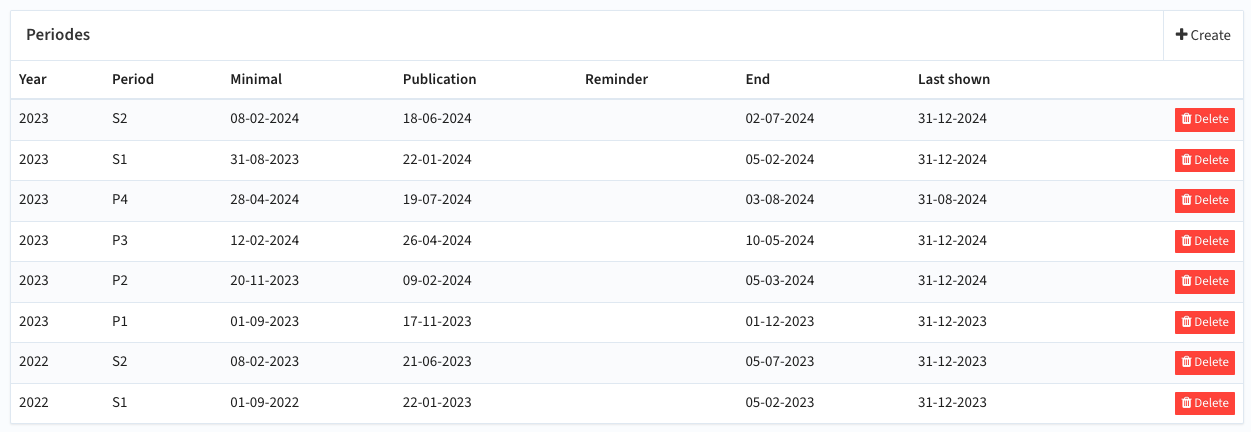
A new period can be created using the Create button, an existing period can be changed by clicking on the period.
Different fields can / need to be filled to define the period:
- Year: the academic year the period resides in
- Period: the code of the period, used as key for integration purposes
- Minimal: the first date the period will be visible and available for actions by users
- Publication: the standard publication date for evaluations in this period. The date is used as default, but can be overwritten in the evaluation process.
- End: the end date of the period, used in the evaluation and notification process
- Reminder: optional reminder date. This is typically not set, but configured in the evaluation workflows
- Start import: the first date, data for this period will be imported / processed
- End import: the last date, data for this period will be imported / processed
- Last shown: the last date, the period is shown .

CSV upload and REST API
Evaluation offers an extensive REST API to feed and retrieve data from Evaluation.
Ask you TimeEdit representative for the documentation.
The Admin -> CSV upload option allows for importing data into Evaluation based on CSV files.
The CSV import is based on standardised layout and formats. The generic rules are:
- Line 1: Header
- Separator: Can be configured during import (e.g. ; or ,)
Select the menu option to start the CSV upload function, and specify the relevant upload information:
- File type: define the type of information that will be uploaded
- Evaluations: import evaluations
- Members: import evaluation relations, e.g. participant, lecturer, ...
- Persons: import persons (users)
- Separator character: define the separator used in the CSV format
- Quote character: define the quote character used in case values are imported that are enclosed in quotes.
- Select or drag the file into the upload box.
Click on Save to start the upload and processing.
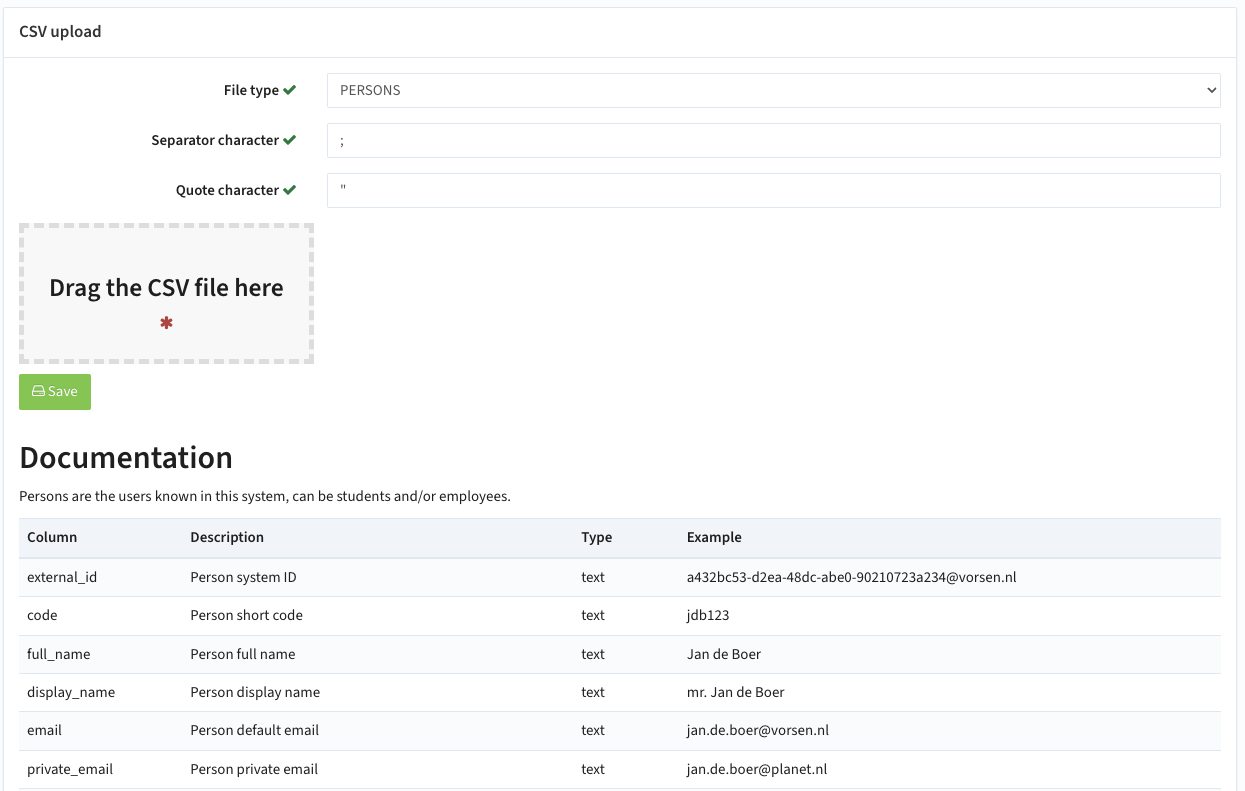
The documentation for the selected type is shown directly after selecting the File type.
The last line of documentation contains an example in CSV format containing the Header and a Data line.
News
The Admin -> News option allows for define the news item(s) to be displayed on the users dashboard.
News can be used to publish information on the accessibility and availability of the support desk, but can also be used to define a specific message during a defined time frame.
Selecting the menu will open the overview of the news items.

A new news item can be created using the Create button, an existing news item can be changed by clicking on the item.
Different fields can / need to be filled to define the period:
- Start date: the date from which the news item will be shown on the user dashboard
- End date: last date the news item will be visible on the user dashboard
- Title: title shown on top of the news item
- Message: the news item text
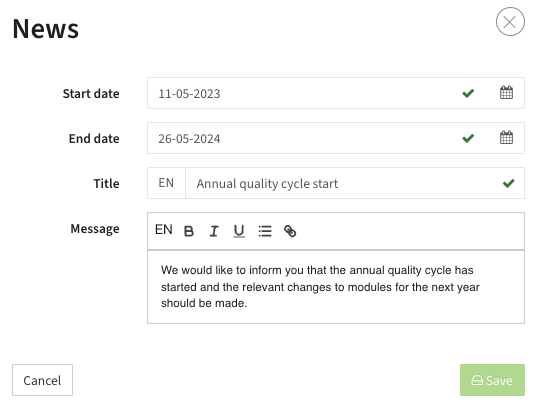
Parameters
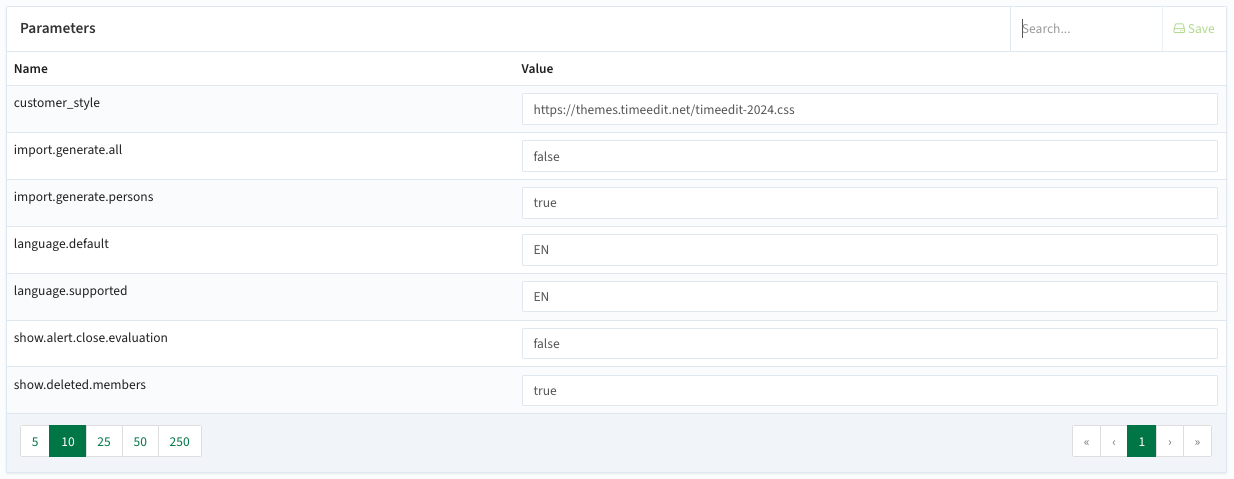
The Admin -> Parameters option allows to set global behaviour parameters for Evaluation.
Selecting the menu will open the overview of the configure parameters.
The parameters supported are:
- customer_style: the styling css to use
- import.generate.all: indicator if on import all received types (person, evaluation, ...) should be generated
- import.generate.persons: indicator if on import the persons should be generated automatically. For instance if a participant is added to an evaluation, should a corresponding person be created
- language.default: the default language when opening Evaluation, in case no other language determination option is available
- language.supported: the language(s) supported in the user interface.
- show.alert.close.evaluation: allows to show an alert in the browser in case the respondent closes the evaluation and has not yet submitted it.
- show.deleted.members: allows to hide/show evaluation members (e.g. coordinator, lecturer) that are assigned to the evaluation but have no longer an active account.
Technically this is a solution to cover mismatch in interfaces where IDM inactivates a user, and the SRS still delivers the inactive user as a relation to the evaluation.
