How to create a form with week pattern

- In this lesson:
- 1Start with a table section
- 2Add mandatory data sources as elements
- 3Map data sources to the right elements
- 4Add additional input elements
- 5
- 6
- 7
- 8
- 9
- 10
- 11
Start with a table section
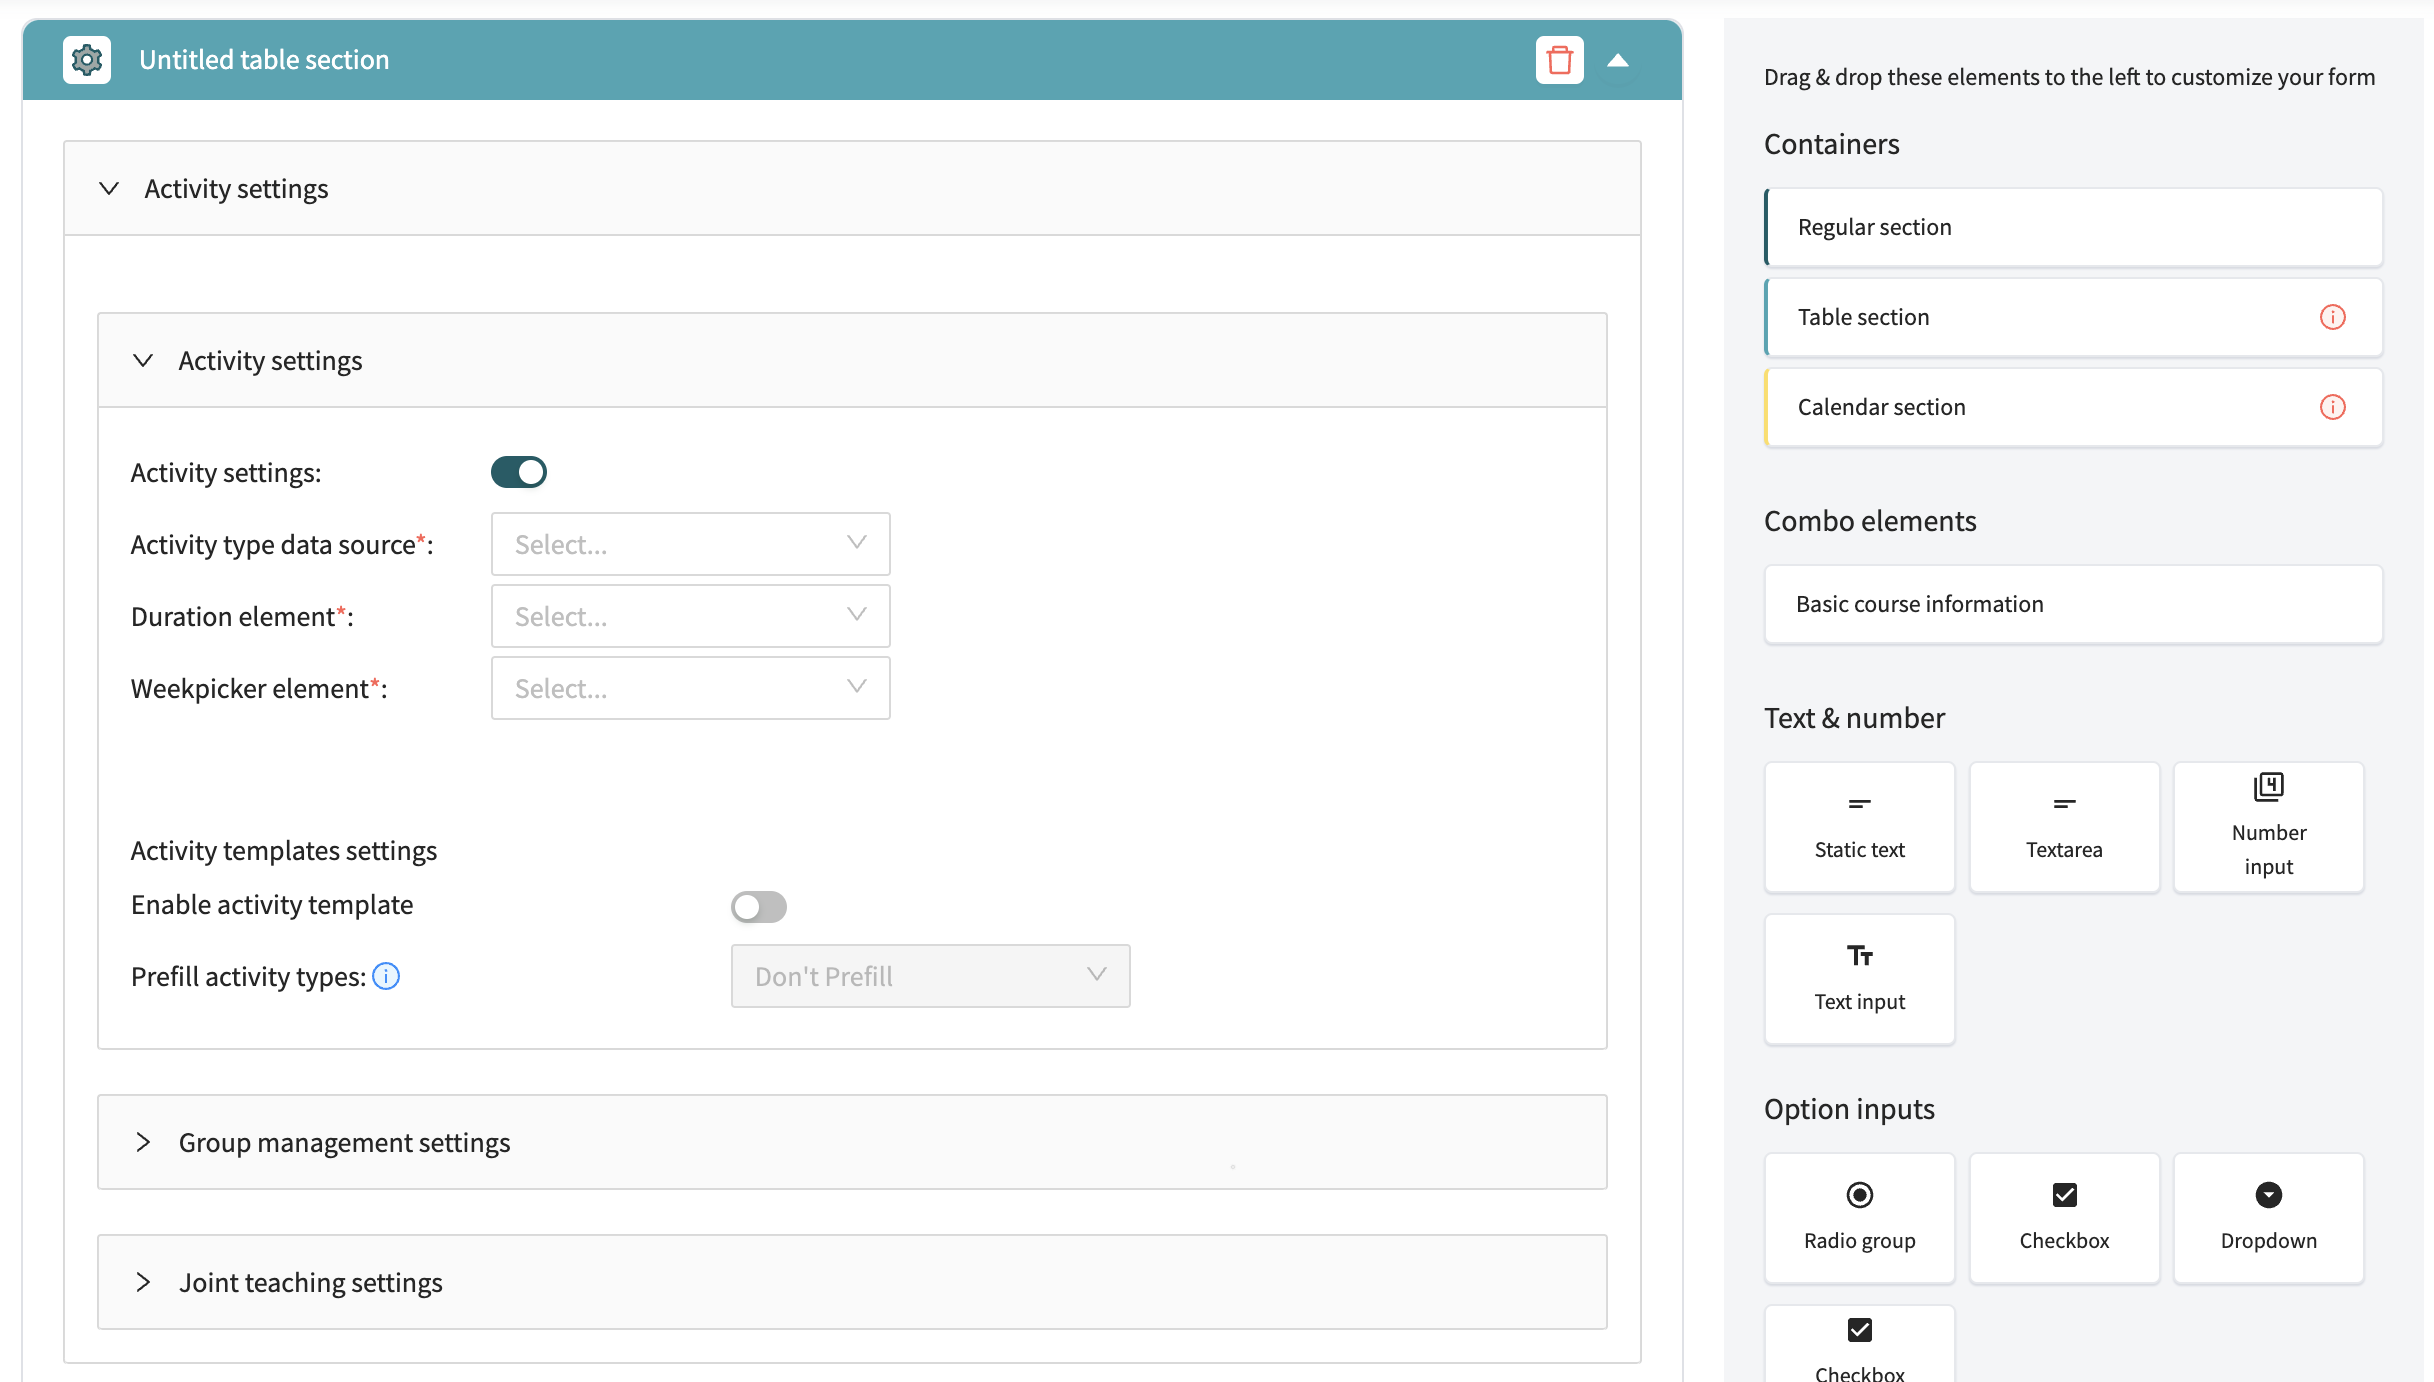
The week pattern functionality is part of the Table section element, found in the top of the elements menu in the designer tab in Preferences. To start design a form with a week pattern, follow these steps:
- Drag and drop a table section into the canvas area.
- Expand the “Activity Settings” box
- Toggle the “Activity Settings” so it turns green
You should now have a view like this in your designer:
Add mandatory data sources as elements
You will now see three field which you need to map to an element in order to have the minimum information for the week pattern to work. To define these you need to drag and drop three elements to the table section (once again found in the Element menu to the right):
Activity Type using the Data Source element
- Drag and drop a Data Source element to the Table section
- Name the element to something relevant in the Element Label field, such as Activity Type
- Toggle the element as required so it lights up green
- Select the object type you want to use in the Data Source drop-down menu
Duration using the Duration element
- Drag and drop a Duration element to the Table section
- Name the element to something relevant in the Element Label field, such as Duration
- Toggle the element as required so it lights up green
Weeks using the Week picker element
- Drag and drop a Week picker element to the Table section
- Name the element to something relevant in the Element Label field, such as Week
- Toggle the element as required so it lights up green
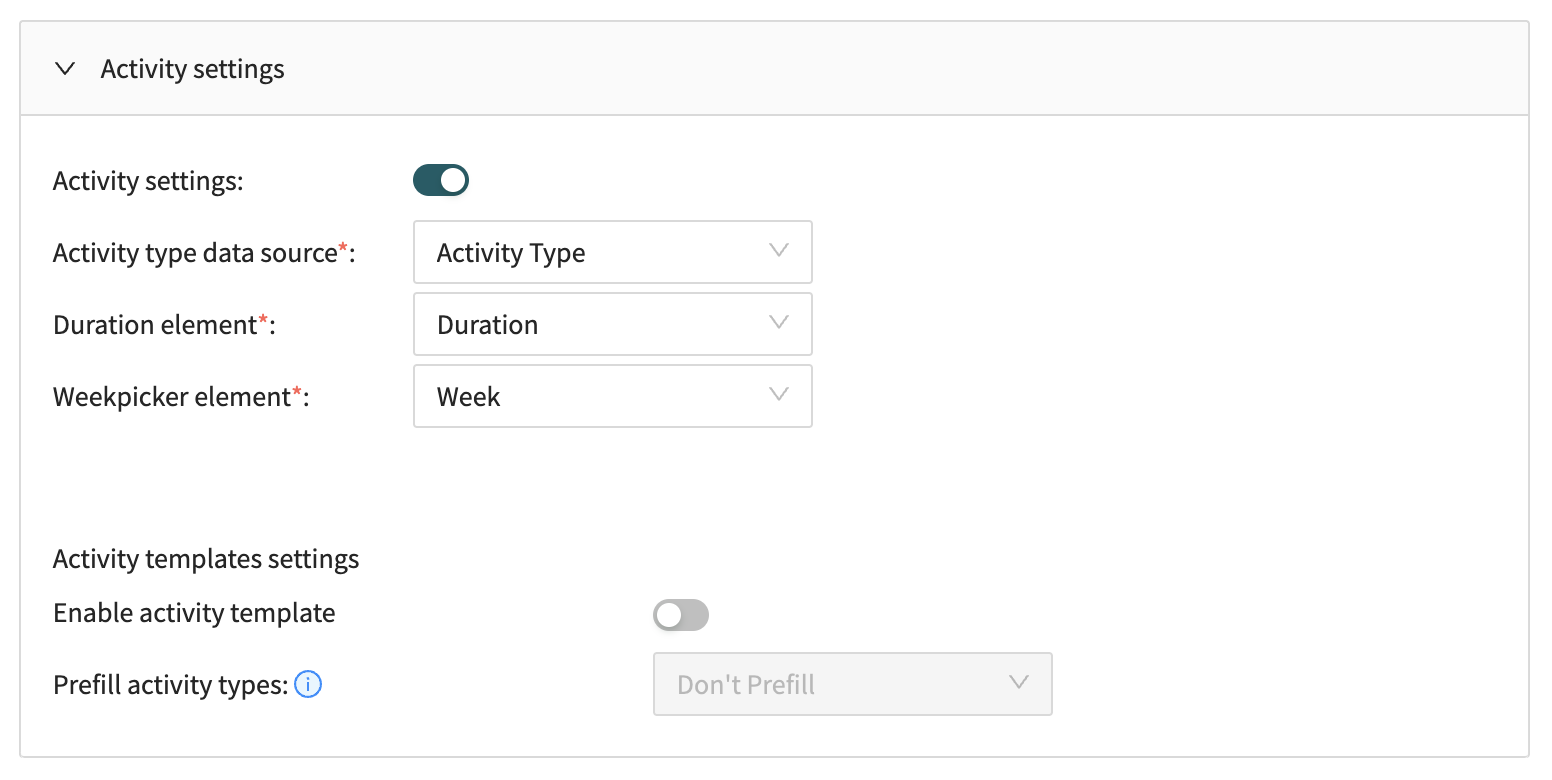
You should now have a view like this in your designer, beneath your Activity Template section:

Map data sources to the right elements
You now need to map the element you just defined to the Activity template section at the top. When expanding the drop down menu for each of the three elements, you should now have only one choice for each.
When you selected these, you should have a view like this in your designer:
In order to use Week Patterns, you must also turn on Activity Templates, as this is a requirement for Week Patterns to work.
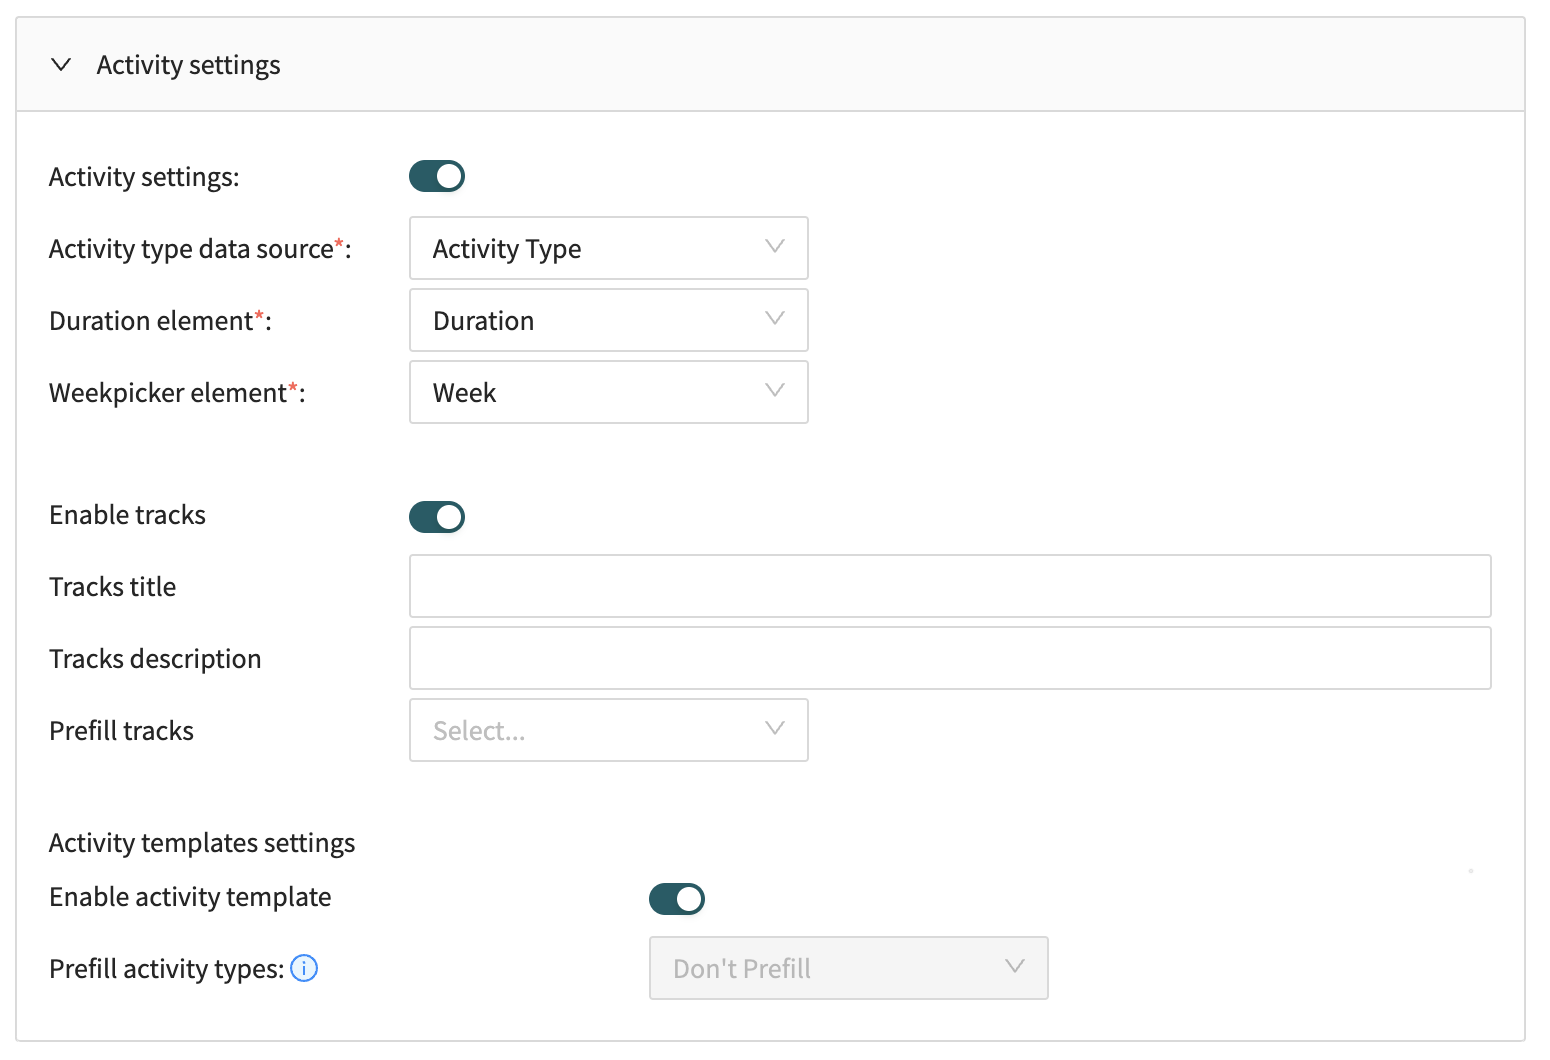
Turning on Activity Templates will also enable (and show) the Tracks settings. It is now possible to give the Tracks input field an optional custom name and description.
It is also possible to configure the Tracks field to be prefilled from some field on the Activity Type. Just select the field you want to use.

You can also select to have the Track field editable by the submitter or locked to the prefilled value.
Add additional input elements
Normally, you would like to add additional elements as you want to collect more data. How you add these follow the same pattern as above - drag and drop your element into the table section below the Activity Template section and map the element to the its corresponding object type.
Some examples of when to use the Datasource element:
- Room/Location type: Add a Datasource element and select the correct object type / field corresponding to Room/Location type in your TE data model
- Staff: Add a Datasource element and select the correct object type / field corresponding to Staff type in your TE data model
- Equipment: Add a Datasource element and select the correct object type / field corresponding to Equipment type in your TE data model
Some examples of when to use the Text or Number Input element
- Comment: Add a Text input element if you would like to enable your submitters to attach a comment to the timetabling team
- Number of estimated students: Add a Number input element if you would like to collect the expected number of student