Curriculum: manage user communication (labels and news)
The use of the system can be helped by using the language of your own university. All labels, messages (error, warning) and other information shown in Curriculum can be 'translated' into your internally used vocabulary. For instance the default label set uses study, where in your situation course could be more appropriate.

Use your own vocabulary for labels
All texts shown in the application can be configured (and translated) via the menu Administration -> Label.
A label is defined on a page using a 'technical key'.
In the screenshot, the Static.Tab.Schedule.ActivityType.Description is an example of such a 'technical key'.
There is not a complete list of all labels used on each individual page.
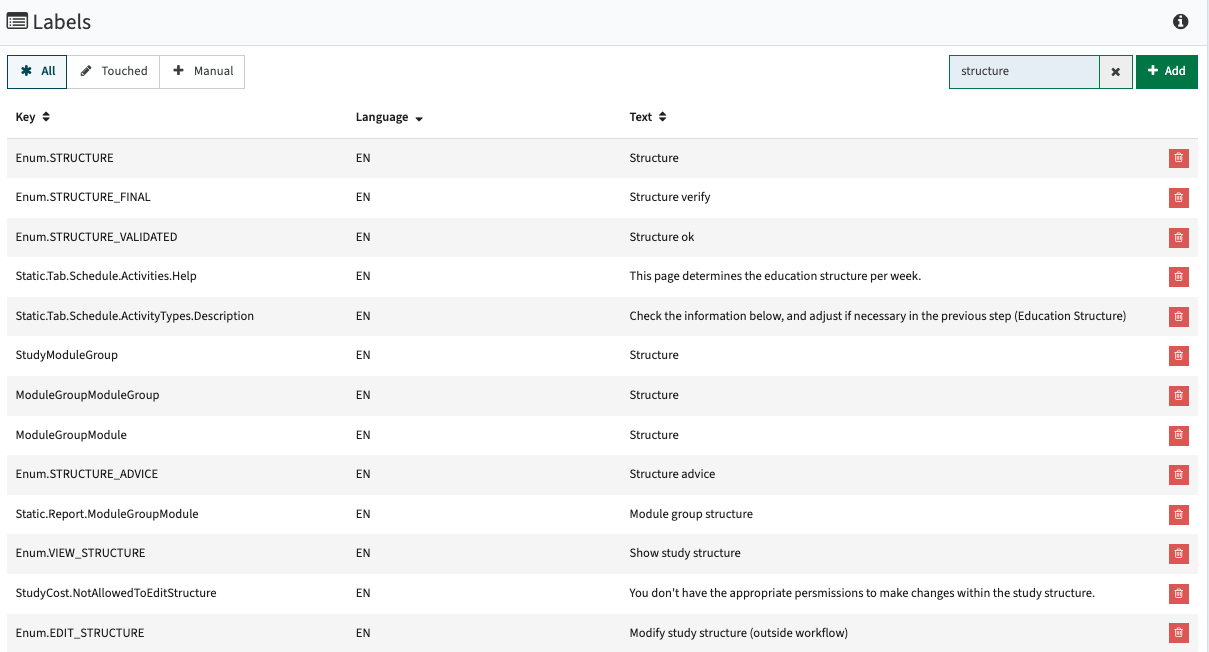
Since there is no list with page -> label information, the easiest way to change a text and determine if the correct text is changed is done by following the following steps:
- Open a second window with the page containing the label / text to be changed
- Search for the text in the label management screen
- Change the text to the desired value and click on Save
- Refresh the secondary window to validate if the text is changed correctly (and if the correct text has been changed).
It it also possible to enrich the label text with an HTML tag.
This might be handy to add a link to external documentation: <a href="https://google.com" target="New">(i)</a>
All labels are automatically predefined with a default text value in the system, set by TimeEdit.
This is done for all supported languages. In case you need another language pack, this has to be configured by TimeEdit, and after configuration the new added language will be available for use. The same option to change the provided label texts can be applied.
If a technical key is shown in the user interface instead of a label or message, this means that the label is not defined automatically.
A first try to solve would be to run the script (Administration -> scripts) synchronize labels. If that doesn't work, the other option is to add the key-label combination manually.
To add this label:
- Click on the “+Add” button
- Copy the 'cryptic name' (label identifier) to the Keyword
- Define the label values for the supported language(s)
- Click on Save
Refresh the user screen to validate if the label is defined correctly and the text is shown in stead of the the label identifier.
Post messages on the dashboard using the news widget
The users personal dashboards provides a way to show generic news messages via the News widget.

The Administrator -> News menu is used to configure news items to be shown on the dashboard.
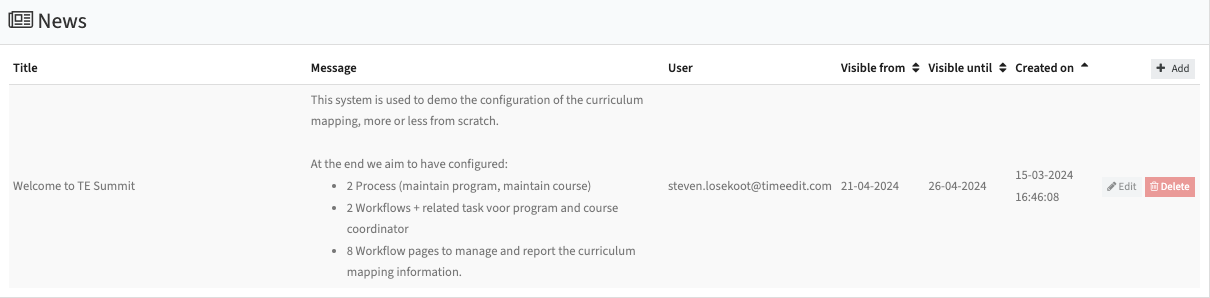
Use the Add button to define a new News item, or the Edit button to change an already defined item.
Use the delete button to remove News items.
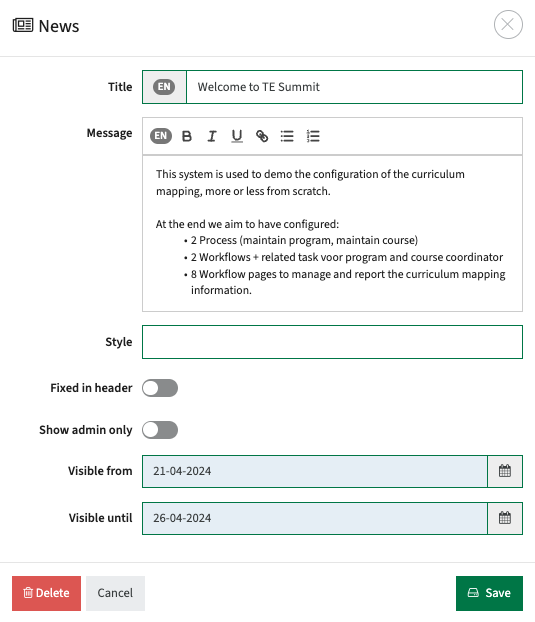
The definition of News items consists of the following elements.
- Title - The title of the news item
- Message - The content of the news item. HTML-tags may be used.
- Style - Style to be applied to the message if Fixed in header is selected. Supported styles are: error, warning, success, info.
- Fixed in header - Show the news message in the page header. Typically used as a banner to inform the users of an upcoming event.
(banner color is dependent on used Style: success → green, warning → yellow, danger → red, info → blue) - Show admin only - Show the message only to the administrator, so it can be tested first.
- Visible from - The start date the news item will be visible
- Visible until - The date until the news item will be visible