How to submit recurring activities using templates
Activity templates are a convenient way to submit recurring activities effortlessly. Instead of manually adding the same activity multiple times, you can create a template and assign it to the respective weeks. This guide will walk you through the process of working with templates.

Step 1 - Start: Fill out basic information
Start by filling out the required information on the submissions start page and select your main course offering object.

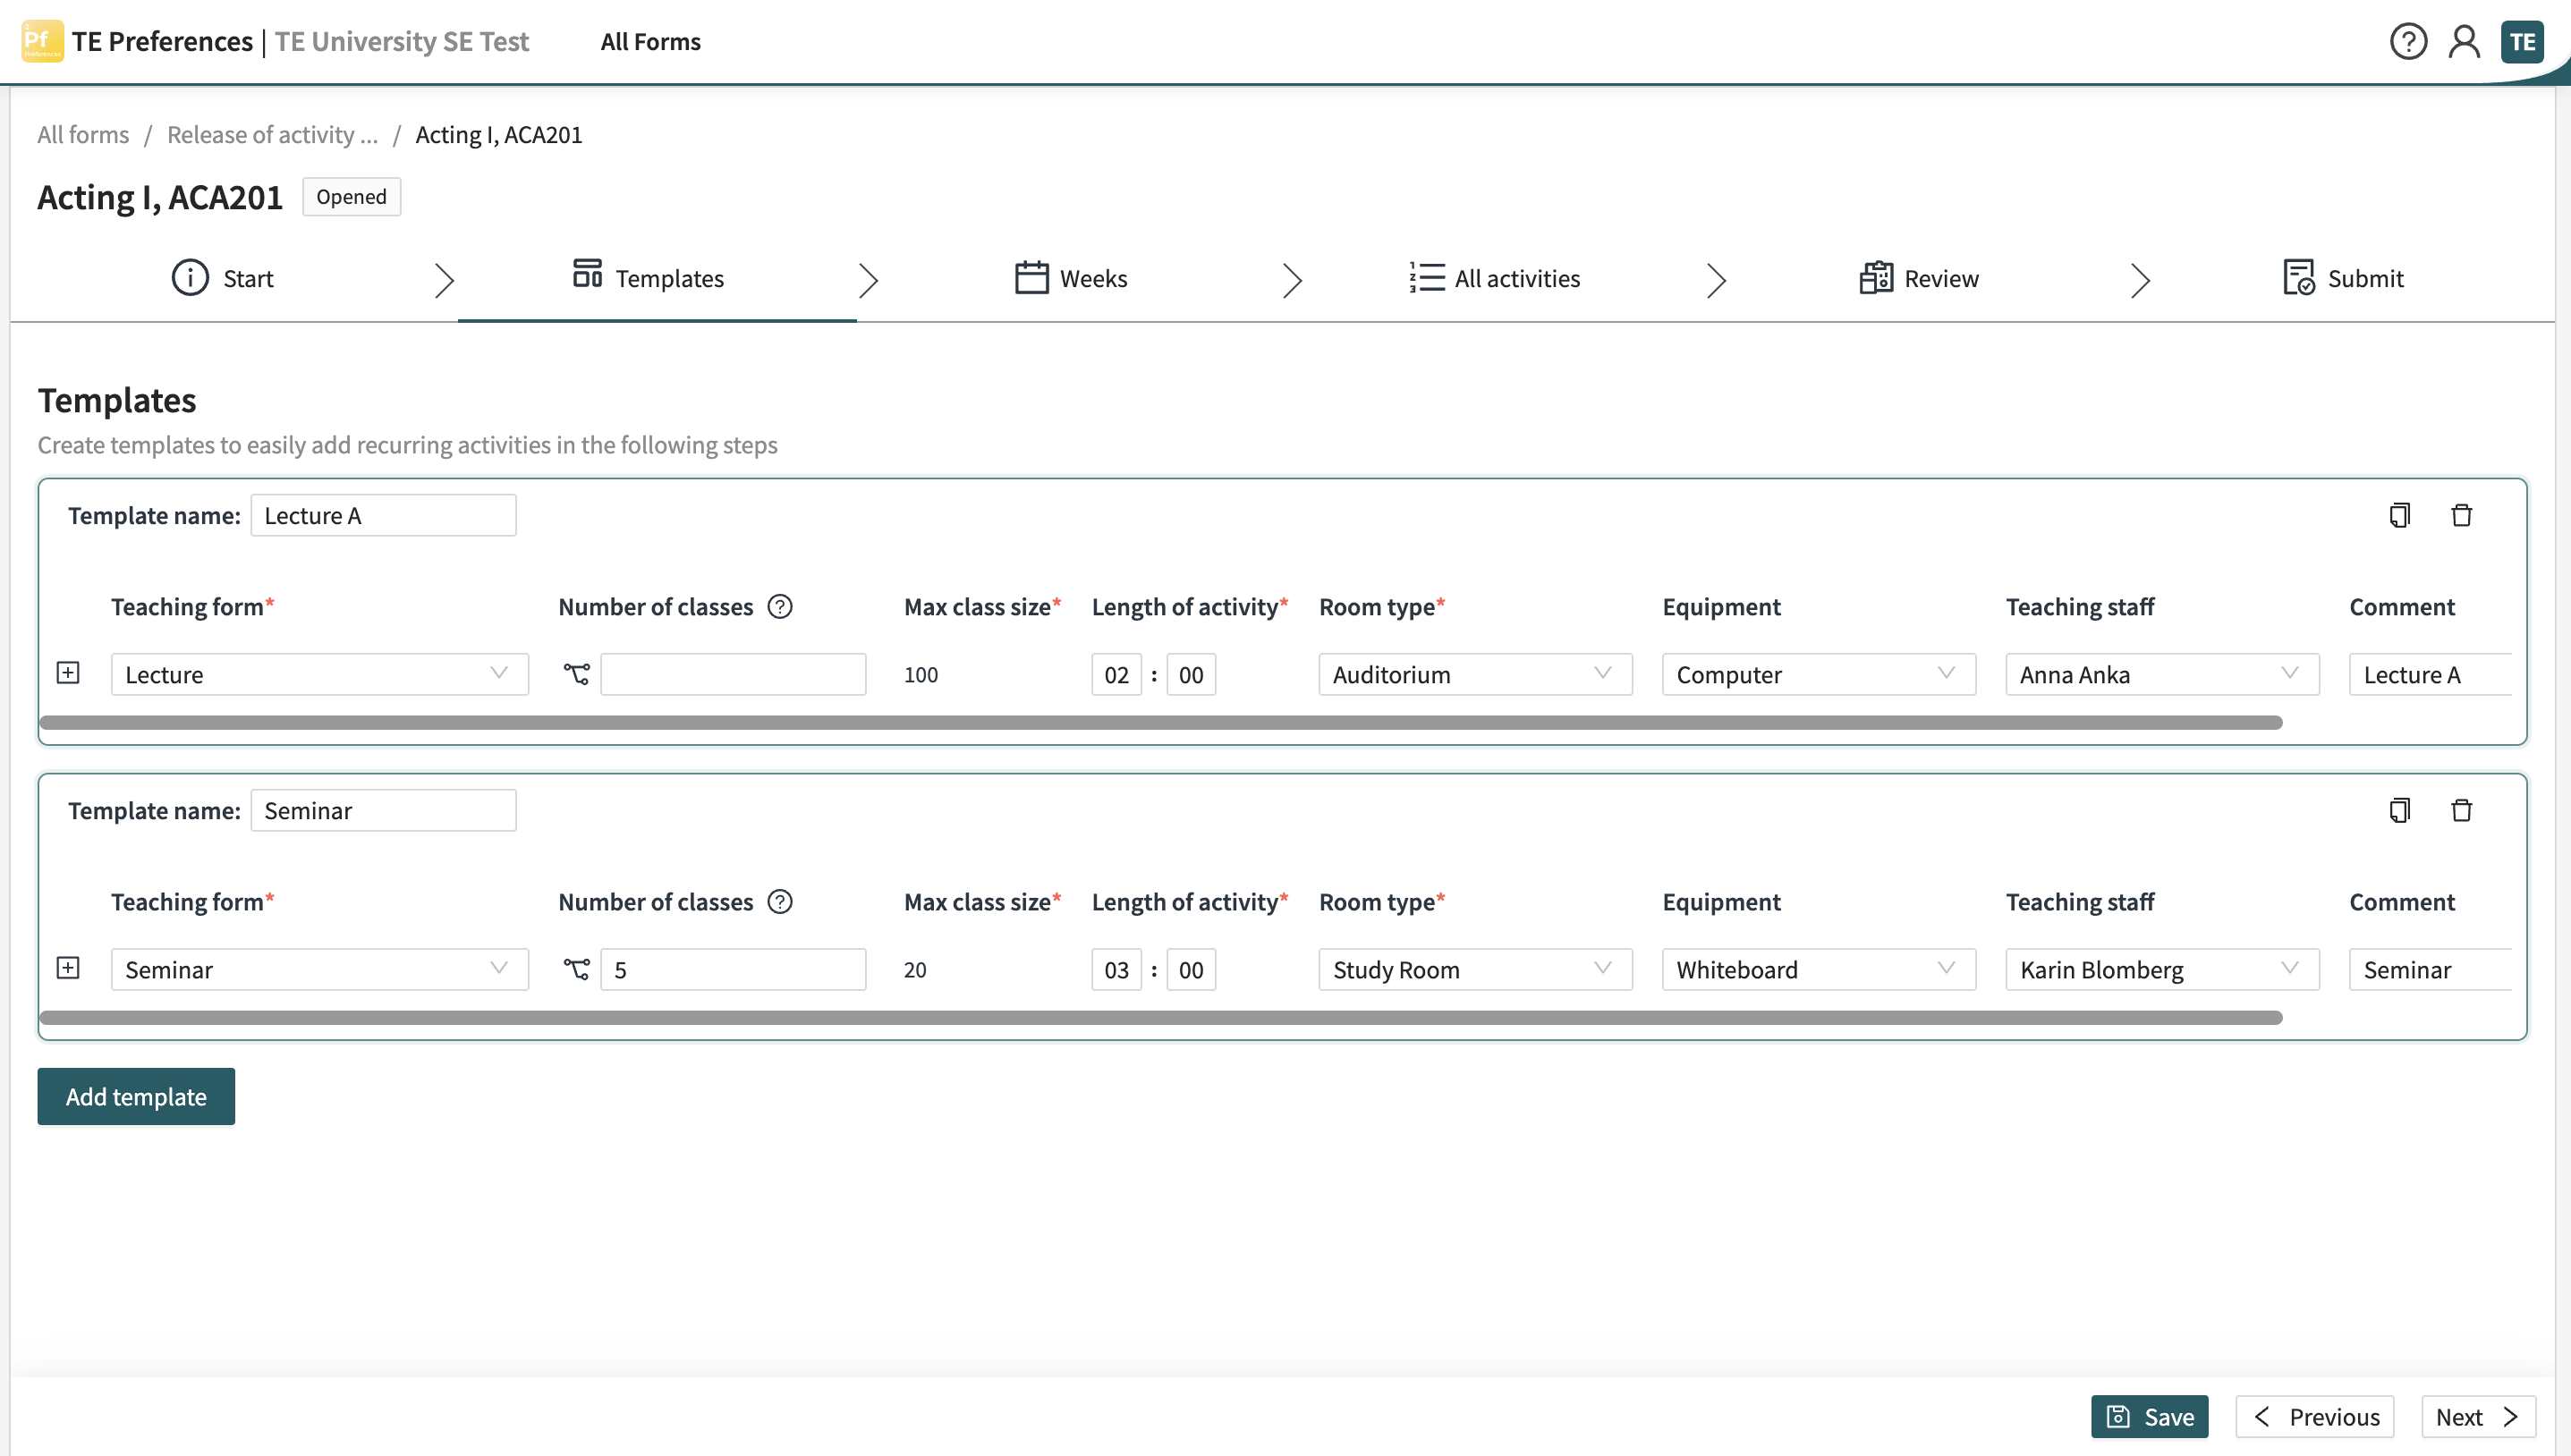
Step 2 - Template: Create activity templates
- Navigate to the "Templates" tab. Click on "Add a Template" and select the activity type, which represents your teaching form.
- Fill in the required fields for each activity, such as duration, room requirements, teaching staff, comments, and more. The specific fields may vary depending on your university's configuration.
- Once you have entered the field values, you can choose to copy the template or add a new one if you have multiple activity types.
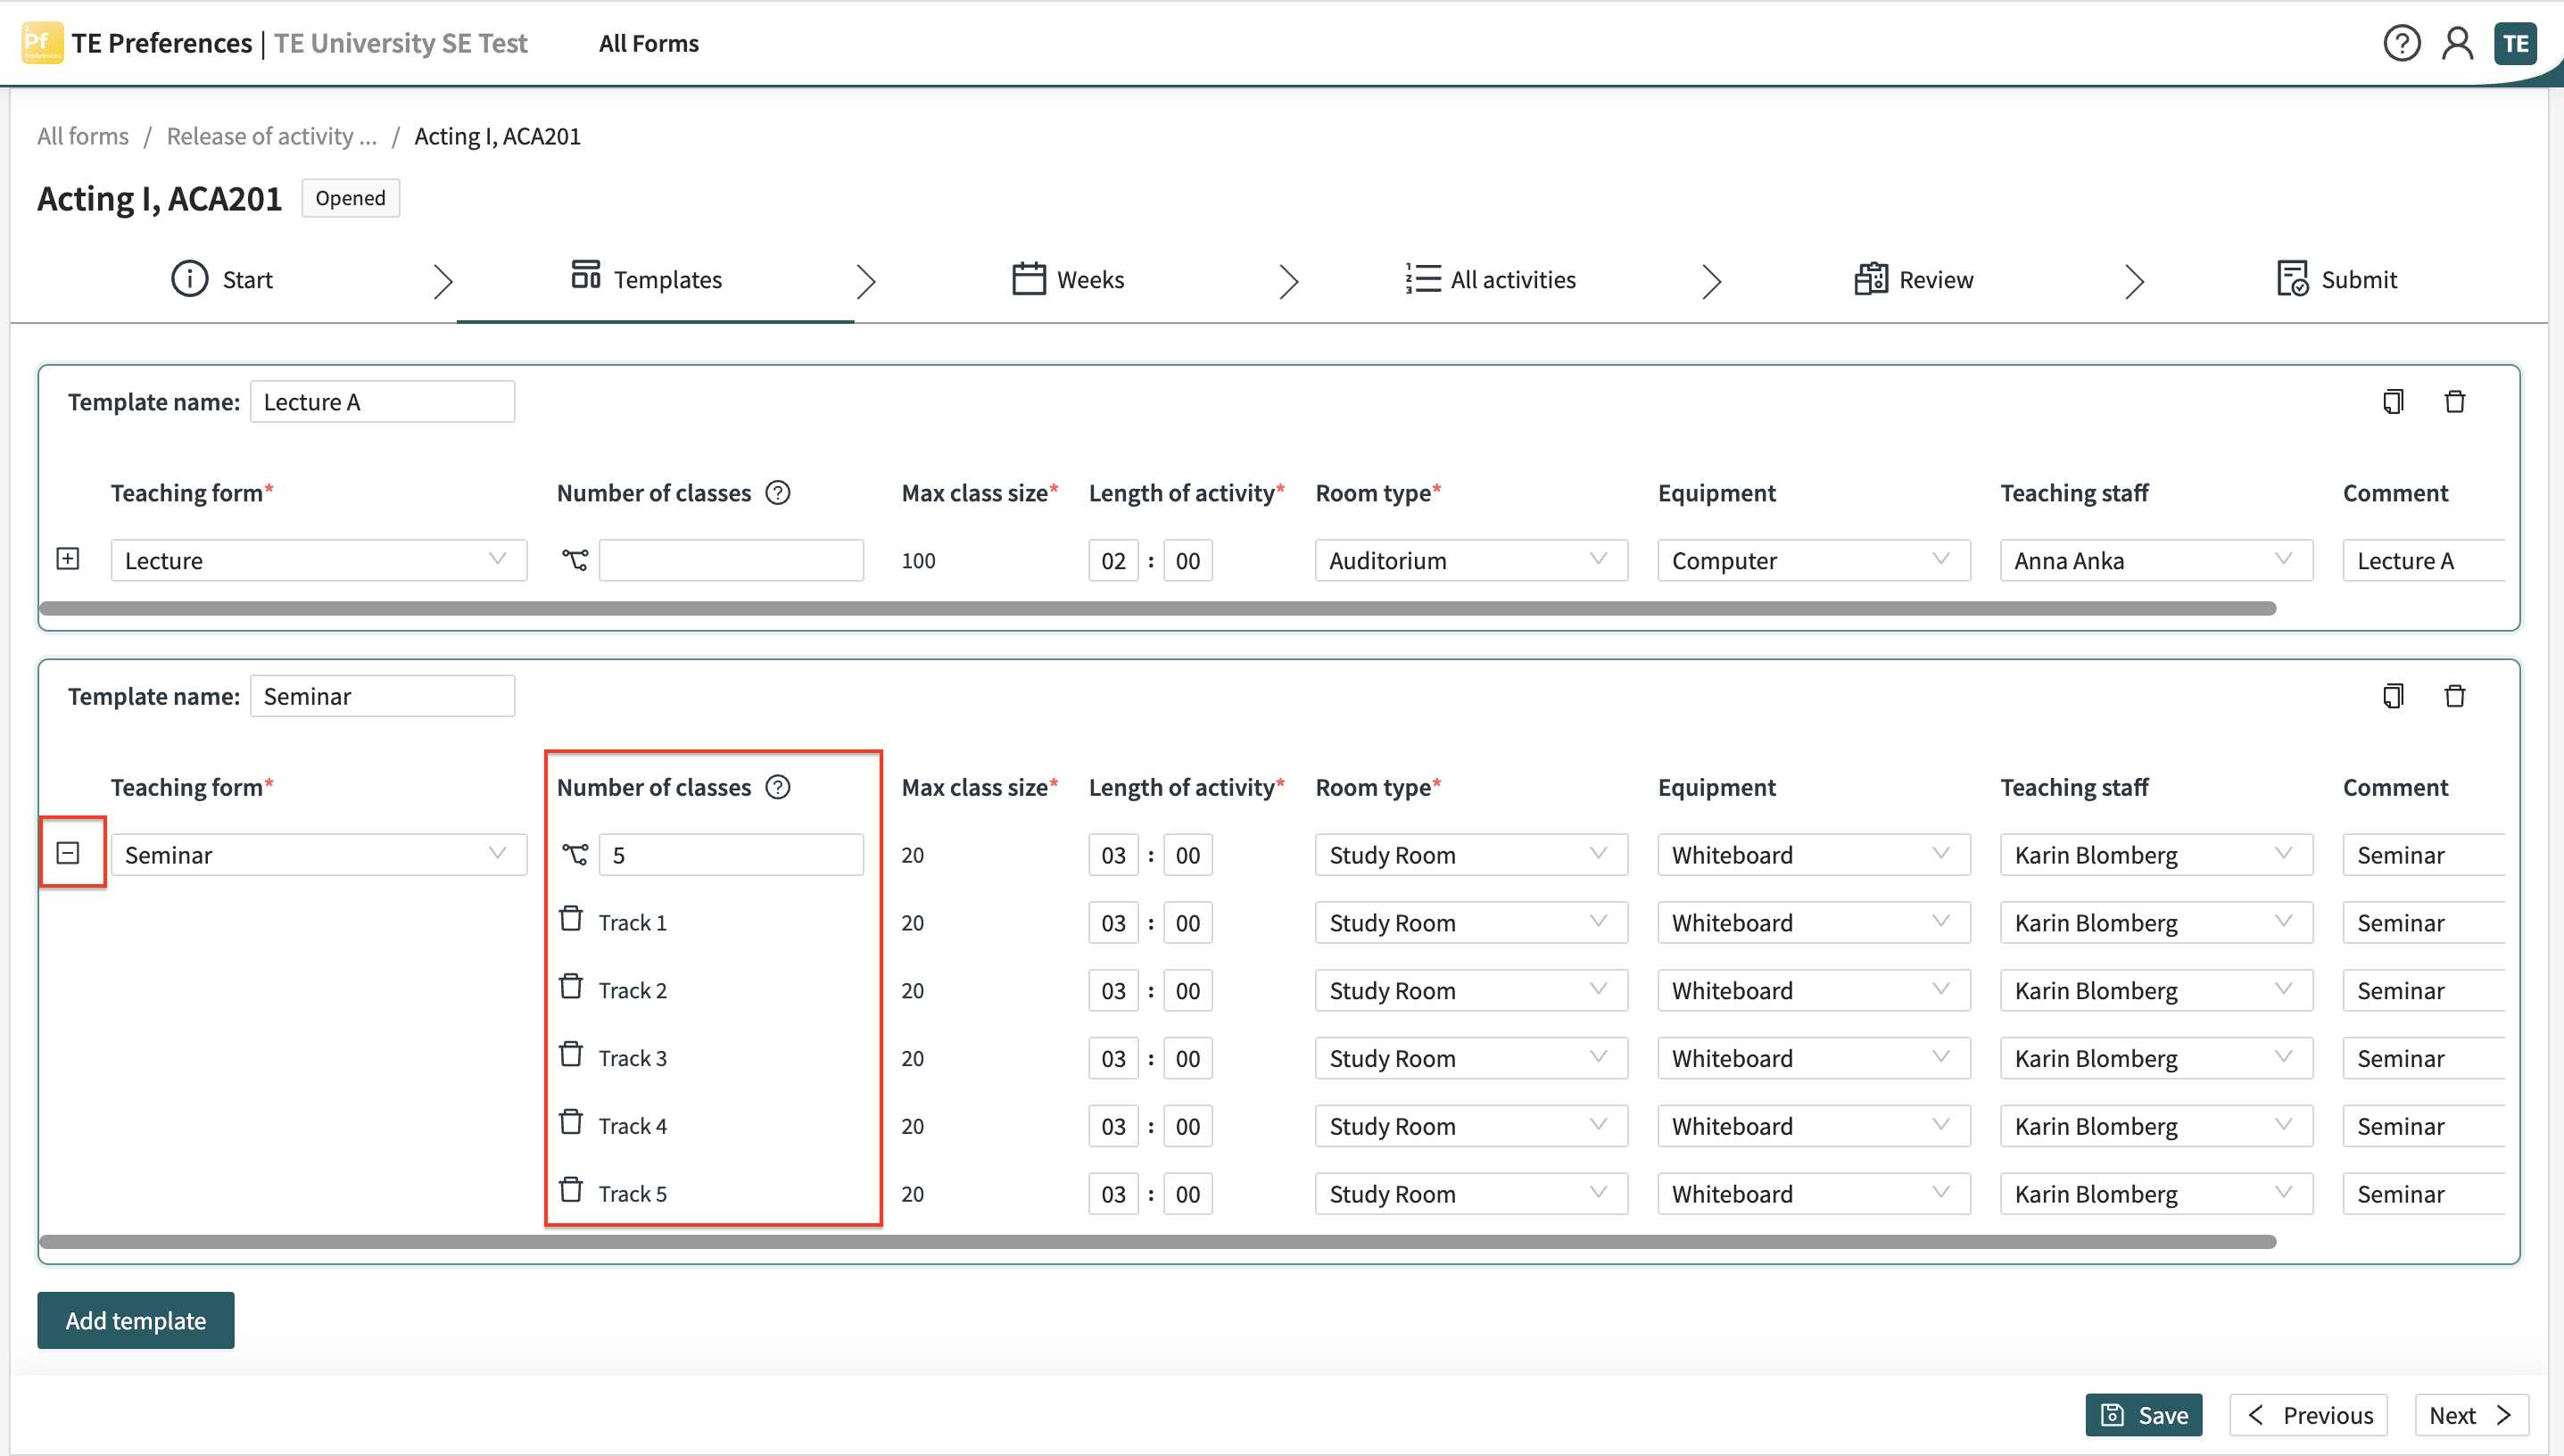
Manage Classes/Tracks
If an activity needs to be divided into multiple smaller groups, such as a tutorial, you can manage this by adding the required number of classes in the corresponding tracks field.
- Add the number of required classes in the corresponding field. If your University has enabled the automatic calculation of classes, you will be asked to enter either max class size or number of classes and the other value will be automatically calculated.
- When multiple classes are added, an expand option will appear with a “plus” icon. Click the icon to expand the row and make exceptions for each class, such as assigning different teaching staff.
Step 3- Weeks: Specify weeks for activities
Create as many templates as needed and proceed to the "Weeks" tab. Here, you can select the weeks in which your activities should run. The displayed weeks correspond to the upcoming teaching period for your university.
- Click on "Add Activity" and select one of your templates to create a teaching pattern for a specific week.
- After setting up the pattern for one week, click on "Copy activities to other weeks" to replicate the activities in additional weeks.
- In the modal that appears, you can choose the weeks to copy the activities to. You can either copy the activities without replacing existing ones or replace all activities in the selected week.
- Adjust the sequence of activities within each week by dragging and dropping them according to your preference.
Once you are satisfied with the activity patterns in different weeks, move on to the "All Activities" tab to make exceptions to the template.
Step 5- All activities: Make exceptions and adjustments
In the "All Activities" tab, each row represents an actual event, such as Lecture A in week 1. If the template has been applied to multiple weeks, you will find corresponding rows here, where you can make exceptions for individual week activities.
Most fields can be edited in the "All Activities" tab, allowing you to customize the details as required by your university's configuration. However, the duration cannot be edited for a single activity within a template.
For more information on working with the "All Activities" page, please head over to this article.
Adding Activities without a Template
If permitted by your university, you can also add individual activities without using a template. As a submitter, you will have the option to manually add activities.
Please note that the availability of this feature may vary depending on your university's settings.
That’s it! You can now proceed to review and submit your activities when you are satisfied with your submission.