Introduction to TE Viewer
TE Viewer enables personalized schedules for students and faculty, as well as building, room, and campus overviews. This article covers the basics of how TE Viewer is structured.

Logging in
To get started with setting up your views in TE Viewer, you need the name of your organization, your username, and password. This information is provided by your TimeEdit administrator.
- Go to www.timeedit.net in your web browser.
- Click the TE Viewer & TE plan link to proceed.
- Find your organization by typing its name in the text input field and select it when it appears in the list.
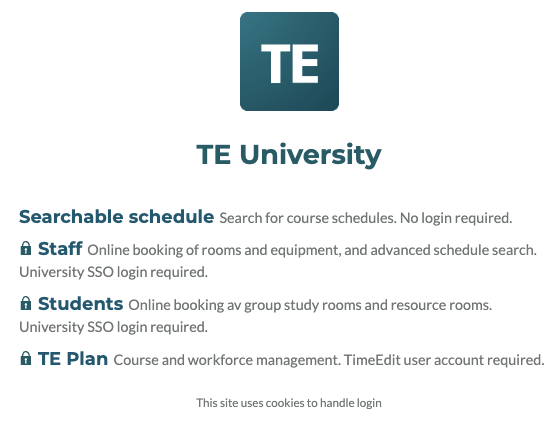
Note that your organization may have several databases. The database with [cloud] behind the name of your organization is the production database. - You will be presented with a list of links - Entrances - set up for your organization (more information about entrances in the next section of this article). Select one and log in with your credentials.
Administrator login
Click the "Admin" link in the top left to log in to TE Viewer Admin. Another page will open where you are asked to enter the login details you received from your administrator.
Forgot password?
TimeEdit also has a "Forgot password" button for local user accounts where you can request a password reset. You can then reset your password by following the instructions provided in the sent-out email.
Note that if this is your very first login, you will need to click "Forgot password" to have instructions sent to your email address.
Basic terminology
Please note prior to learning the basic terms of TE Viewer, we suggest you understand the TE Core terminology.
Entrances
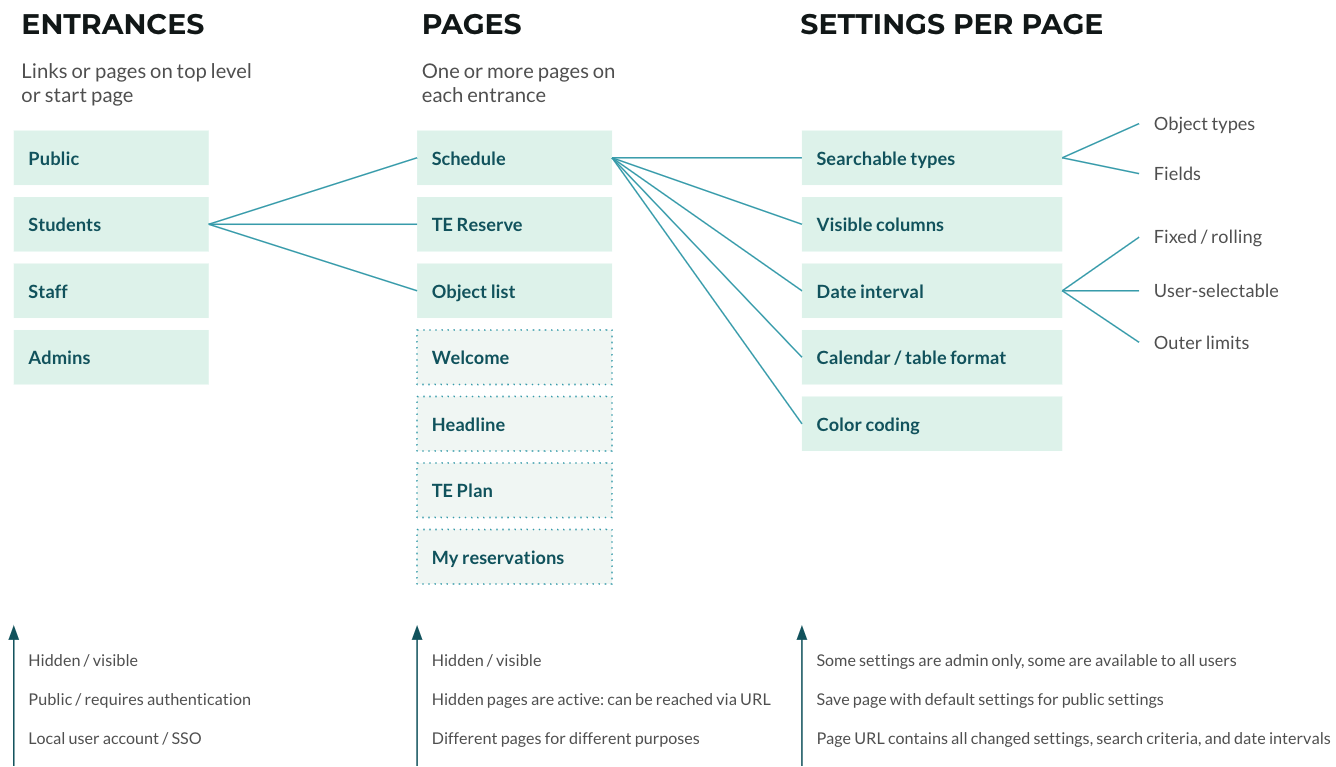
Entrances are the top level of TE Viewer's structure. They can be either public or require users to log in to access their content, and can contain a number of pages and links to additional views and resources.
Usually you divide them by either staff or student areas, a public area with non-sensitive information, and a section accessible to administrators only.
Pages
A page is where you will display your schedule or resource/facility overviews, and can be tailored in a number of ways.
Settings, per page
There are a multitude of settings available to help customize your pages; everything from which object types and fields to present, which date ranges you want to make available, as well as how you want to visually represent the information you have picked out.
Some settings are available to all users, who can then set their personal preference for how to display the information made available, while other settings are only available to administrators. Typically these are to set constraints on what information to display to other users, as well as default display settings that will apply to all.
Hidden / visible
Hidden entrances and pages are active but one must know the URL to be able to use them.
Entrance overview
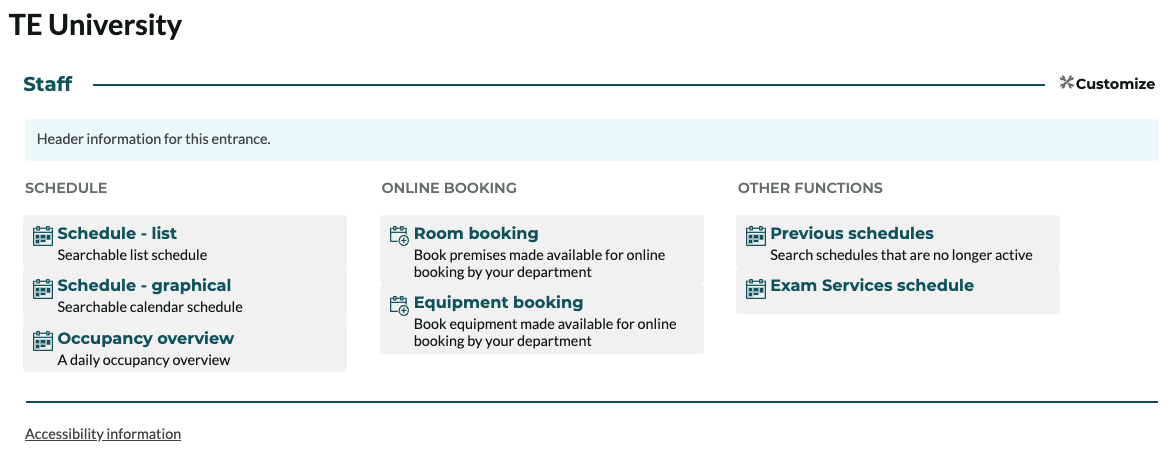
Each entrance consists of a welcome page containing a customizable header, footer, and logo, that you can populate with any information you find appropriate.
Below the header you'll find the main content: your pages and links. Headlines can be used to group and describe the pages you've added, and is especially useful if the entrance contains many pages. The headline has a name and an optional short text description.
You can access the entrance settings using the Customize icon on the upper right corner of the page, which is where you add and work with all your entrance's content.
Creating a new page
Navigate to the entrance you would like to add the page to.
- Click Customize
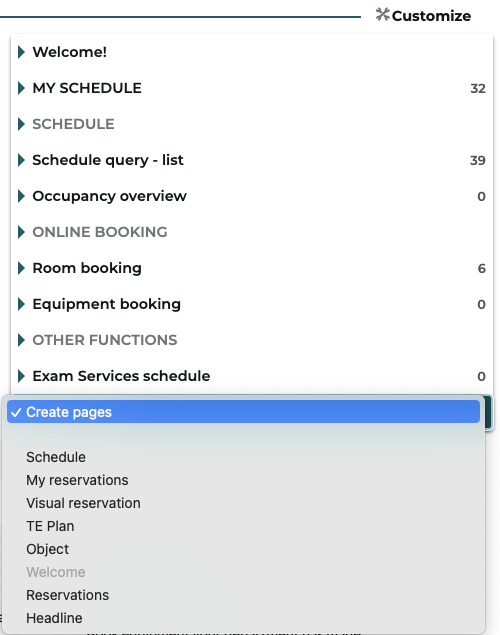
- Click "Create Pages" at the bottom of the menu
- Select the type of page you want to create from the list of options. Note that you can also create Headlines via the Customize menu
Add information about the page
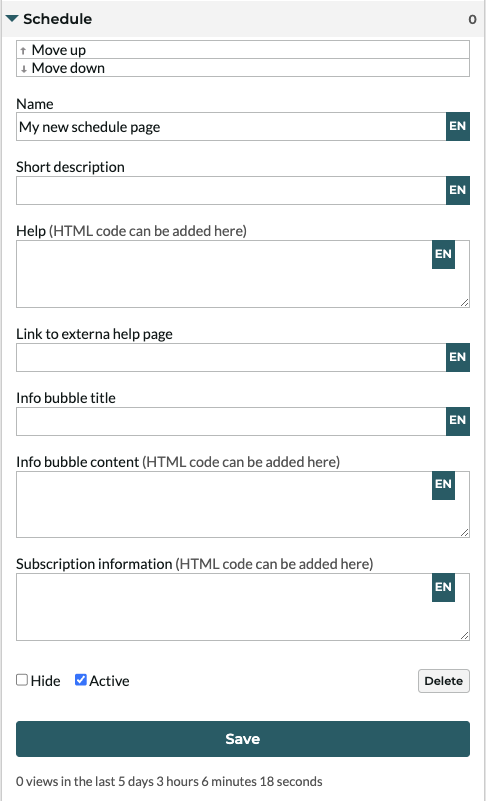
Once you have created the page, it will appear at the bottom of the list of pages in the Customize menu. Click on it to access its settings.
You can add a number of additional information about the page:
- Short description: this will be shown below the title of the page in the Entrance view
- Help: This help text will be displayed in the page's search result area
- Link to external help page: if provided, this will add a Help link to the top bar of the page, leading to the provided URL
- Info bubble title and content: The info bubble is displayed at the bottom of the page
- Subscription information: this is information you may want to provide to users when they click "Subscribe" on the page
You also have options to hide the page, inactivate it (it is active by default), or delete it.
Hiding the page means you will remove it from the entrance, but it can still be reached by any user who has the page's URL. This can be useful when you want to share something with a more specific audience without making it accessible to everyone who can access the entrance.
Inactivating a page means it will not be accessible via its URL, nor shown in the entrance view. This is a good way to hide work in progress, or out of date views that you may want to update rather than delete it.
Arranging your pages
In addition to using headlines to group your content, you can also rearrange each headline and page to decide their order of appearance.
Open the Customize menu and simply drag and drop the pages and headlines into the order you would like for them to appear.
To group pages under a headline, simply move them underneath it and they will be nested under it in the view.
The Schedule page
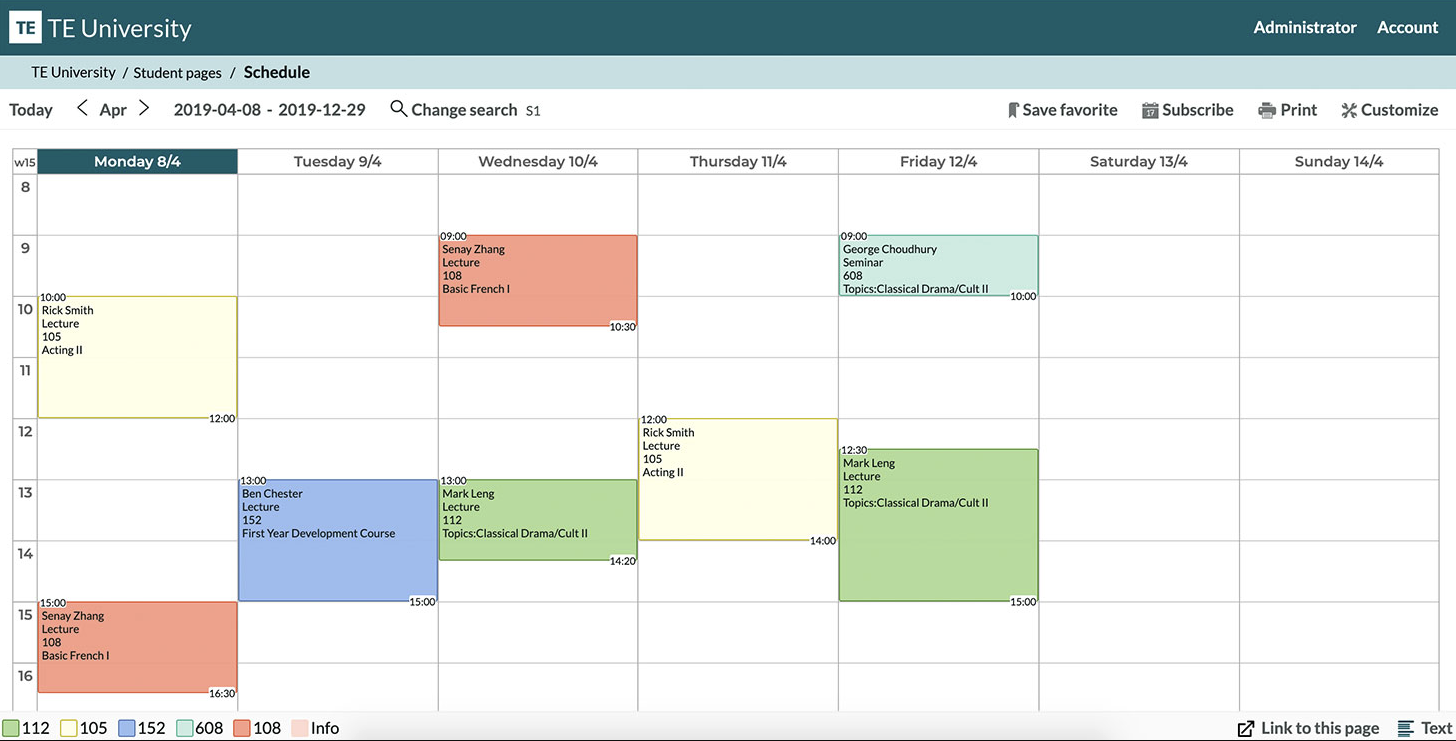
Schedule pages consist of a number of components: the period and date selector, search area, subscription and download options, as well as a number of settings (available under Customize), and quick actions located at the bottom of the page.
Date selection
A Schedule page can have two ways to select the date range you want to view: the period selector or the date range picker. The period selector will pick the predefined date range for the period that you have set up for your TimeEdit products, such as Semester 1 2023, while the date range picker will let you select a custom date range within the constraints of the page.
Search
This is where you will search out your schedule information. You can either have the page populated with a predefined search upon entry, or leave it empty and let the users search out what is of interest to them. Along with a free text field you can provide users with a number of controls to refine the search results further; this is a highly configurable area of TE Viewer that will give you a very fine-grained control over what can be searched for and displayed.
For each TE Viewer page, you define which objects and fields a user may view and search for by using the Customize -> Admin -> Search settings.
Top menu options
The top menu contains, along with the search and date selection, a few more options:
- Save favorite: by saving a favorite, a user can save their search results and visual settings as a shortcut. The next time they go to the page, they can use the saved favorite to quickly get back to the search result and visual representation that they set up.
- Subscribe: provides a link to integrate the schedule with your other calendar applications.
- Download: you can download the schedule as a PDF, Excel, etc. This is also where you find a link that adapts the schedule to be presented in full screen.
- Filter: this is a quick way to add further filtering to your search results.
- Customize: this is where you will find the page's general settings, including the admin settings.
Bottom menu options
The bottom menu is located in the banner at the bottom right of the view, and offers quick links to:
- Page's info bubble, set in the entrance's page settings
- Switch between the graphical and text-based schedule
If enabled via the admin settings, you will also find the following features in the bottom menu:
- Edit reservations: a shortcut to edit a reservation (or multiple, if enabled), given that the user has the right permissions to do so
- Add to My list: this will add the selected reservations to My list in TE Core
- Hide reservations: this will hide selected reservations from the view. This can be used in combination with the Link to this page to provide a filtered schedule view
- Link to this page: quick link to share the page via URL, including temporary settings you may have set
Main content area
This is where you will see your schedule information, based on your set date range, search criteria, and page settings.
Settings
You can find the page settings under the Customize menu at the top right. There are three main categories which the settings are divided into:
- Layout: general page layout (public setting available to all)
- Reservations: presentation and content of reservations
- Admin: this is only accessible to administrators. Search criteria, date intervals, searchable content, etc.